Flying an FPV (First Person View) drone is one of the most exciting ways to experience flight. You see through the drone’s eyes as if you’re in the cockpit. For beginners, choosing the right FPV camera is a critical first step. The camera is the window to your flying world. It affects how you see obstacles, judge speed, and control your drone. But with so many options, it’s easy to get confused by technical words and endless choices. This guide will help you find the best FPV camera for beginners, explain what really matters, and help you avoid common mistakes.
What Makes An Fpv Camera Good For Beginners?
Not every FPV camera is beginner-friendly. Some are made for racing pros or filmmakers. Others are perfect for people just starting out. So, what should you look for?
Simplicity And Ease Of Use
As a beginner, you want a camera that is easy to install and set up. Complicated settings or special tools can make the learning process frustrating. Most beginners benefit from a camera that works well out of the box.
Price And Value
Crashing is part of learning FPV. Your first camera should be affordable but reliable. This way, you won’t feel bad if it gets damaged. Expensive cameras are not necessary for beginners.
Image Quality
You need a camera that provides a clear, bright view. But super high-definition cameras are not always better for learning. They can add delay (latency), making it harder to control the drone smoothly. A good beginner camera balances clarity and real-time response.
Durability
FPV drones crash. Choose a camera built with strong materials, like a metal or thick plastic case. This helps the camera survive accidents.
Latency
Latency is the delay between what the camera sees and what you see in your goggles. Lower latency means you get information almost instantly, which is crucial for fast reactions. For beginners, a latency under 40 milliseconds (ms) is usually good.
Field Of View (fov)
A wider FOV helps you see more of the area around your drone. This is useful when learning to fly, but too wide can make judging distances harder. Most beginners do well with a FOV between 120° and 150°.
Camera Size And Mounting
FPV cameras come in different sizes: micro, mini, and standard. Make sure the camera fits your drone frame. Micro cameras (19mm width) fit most beginner drones.
Standard Camera Types
There are two main types:
- Analog FPV cameras: Most common for beginners. Cheaper, less complicated, and with less delay.
- Digital FPV cameras: Newer, offer clearer images but are more expensive and require special video transmitters and goggles.
Most beginners start with analog for cost and simplicity.
Top 7 Fpv Cameras For Beginners In 2024
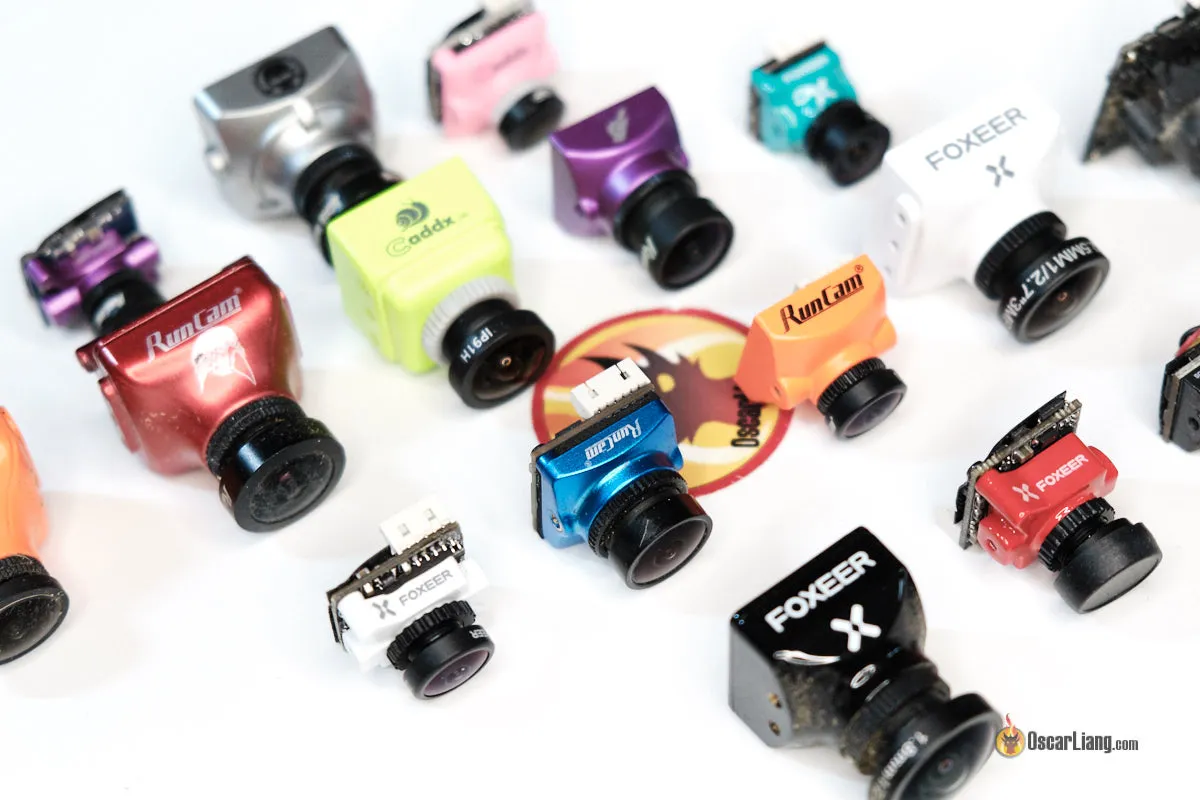
Let’s look at some of the best beginner FPV cameras available. Each is chosen for its balance of price, performance, and ease of use.
1. Runcam Nano 2
The Runcam Nano 2 is a popular choice for small drones and whoops. It’s reliable, simple, and offers good quality for the price.
- Size: 14x14mm (nano)
- Weight: 3.5g
- Resolution: 700TVL (analog)
- FOV: 155°
- Price: Around $20
This camera is easy to install and gives a clear picture in most lighting conditions. Its small size fits almost any frame.
2. Foxeer Razer Micro
The Foxeer Razer Micro is known for its durability and good image quality, especially in changing light.
- Size: 19x19mm (micro)
- Weight: 5g
- Resolution: 1200TVL (analog)
- FOV: 145°
- Price: Around $18
It’s a great option for beginners who want a solid, all-round camera.
3. Caddx Ant
The Caddx Ant is very lightweight and offers excellent low-light performance.
- Size: 14x14mm (nano)
- Weight: 2g
- Resolution: 1200TVL
- FOV: 165°
- Price: Around $17
Its wide FOV is good for learning, but some beginners may find it a bit too wide for sharp turns.
4. Runcam Phoenix 2
The Runcam Phoenix 2 gives excellent color and detail, making it easier to spot obstacles.
- Size: 19x19mm (micro)
- Weight: 5g
- Resolution: 1000TVL
- FOV: 155°
- Price: Around $30
It’s slightly more expensive but worth it for improved image quality.
5. Foxeer Predator Micro
The Foxeer Predator Micro is famous for its fast response and bright image.
- Size: 19x19mm (micro)
- Weight: 5.5g
- Resolution: 1000TVL
- FOV: 150°
- Price: Around $32
It’s a good investment if you plan to fly in different lighting conditions.
6. Caddx Turbo Eos2
The Caddx Turbo EOS2 is a lightweight and affordable camera, suitable for small drones.
- Size: 14x14mm (nano)
- Weight: 3.5g
- Resolution: 1200TVL
- FOV: 160°
- Price: Around $15
It’s a simple, no-fuss camera for new pilots.
7. Betafpv Nano Hd
The BetaFPV Nano HD is one of the few digital options for beginners, but it requires specific digital FPV gear.
- Size: 14x14mm (nano)
- Weight: 5.7g
- Resolution: 720p (HD digital)
- FOV: 150°
- Price: Around $40
Choose this only if you have or plan to buy a digital system.
Here’s a quick comparison of the top 5 analog cameras:
| Camera | Size | Weight | Resolution | FOV | Price |
|---|---|---|---|---|---|
| Runcam Nano 2 | 14x14mm | 3.5g | 700TVL | 155° | $20 |
| Foxeer Razer Micro | 19x19mm | 5g | 1200TVL | 145° | $18 |
| Caddx Ant | 14x14mm | 2g | 1200TVL | 165° | $17 |
| Runcam Phoenix 2 | 19x19mm | 5g | 1000TVL | 155° | $30 |
| Foxeer Predator Micro | 19x19mm | 5.5g | 1000TVL | 150° | $32 |
Analog Vs. Digital Fpv Cameras: Which Is Better For Beginners?
Many beginners ask whether to choose analog or digital. Both have pros and cons.
Analog Fpv Cameras
- Cheaper to buy and repair
- Less delay (lower latency)
- Compatible with most beginner drones and goggles
- Lower image quality, but good enough for learning
Digital Fpv Cameras
- Much clearer image (HD)
- Easier to see small details and obstacles
- More expensive
- Requires special video transmitters and HD goggles
- Slightly more delay (but getting better every year)
For most beginners, analog is the smarter choice. You can always upgrade to digital later.
Key Features Explained: What Matters Most For Beginners
Let’s look at the technical features that really affect your flying experience.
Tvl (tv Lines) Or Resolution
TVL is a measure of how clear the analog image is. Most beginner cameras range from 700TVL to 1200TVL. Higher TVL means more detail, but after 1000TVL, the improvement is hard to notice because analog video is limited by the system.
Latency
Low latency helps you control the drone with confidence. Analog cameras usually have latency under 20ms. Digital systems can have 28ms to 40ms, which is still fine for casual flying.
Fov (field Of View)
Wide FOV (like 150°) lets you see more, but some pilots find it distorts the image. If you plan to fly in tight spaces, a slightly narrower FOV (120°–140°) may help.
Lens Size
Most FPV cameras use a 2.1mm or 2.3mm lens. A 2.1mm lens gives a wider view. Stick with the standard size unless you have a special reason.
Wide Dynamic Range (wdr)
WDR helps the camera show details in both bright and dark areas at the same time. This is important when flying from sunlight into shadow. Cameras with true WDR or D-WDR are better for outdoor flying.
Power Supply Range
Most beginner cameras can handle 5V to 36V. Make sure the camera can use the same voltage as your drone’s flight controller or video transmitter.
Durability
Choose a camera with a metal case or strong plastic. Some cameras have a special “crash-resistant” design.
Here’s a feature comparison for the top 3 beginner cameras:
| Feature | Runcam Nano 2 | Foxeer Razer Micro | Caddx Ant |
|---|---|---|---|
| WDR | No | Yes | Yes |
| Voltage Range | 3.3V–5.5V | 4.5V–20V | 3.7V–18V |
| Lens Size | 2.1mm | 2.1mm | 2.1mm |
| Case Material | Plastic | Plastic | Plastic |
How To Choose The Right Fpv Camera For You
Now that you know the main options and features, how do you pick the best FPV camera for your needs?
1. Check Your Drone’s Frame Size
Measure the camera mount on your drone. Most beginner drones fit micro (19mm) or nano (14mm) cameras. Standard size (28mm) is less common for small drones.
2. Decide On Analog Or Digital
If you have analog goggles and a basic video transmitter, choose an analog camera. If you own a digital system like DJI FPV or HDZero, look for compatible digital cameras.
3. Think About Lighting Conditions
If you fly outdoors, look for good WDR. If you fly indoors, choose a camera with great low-light ability.
4. Set Your Budget
You don’t need the most expensive camera to learn. Cameras between $15 and $30 are perfect for beginners.
5. Read Real User Reviews
Look for feedback from other new pilots. They often share if a camera is hard to set up or has problems with certain gear.
6. Avoid Overcomplicating
Don’t get lost in technical specs. Focus on fit, image quality, and price.
Common Beginner Mistakes To Avoid
Even with the right camera, new FPV pilots make mistakes that can cost time and money.
Choosing The Wrong Size
A camera that doesn’t fit your drone is useless. Double-check the mount size before buying.
Ignoring Voltage Compatibility
If you connect a 5V camera to a higher voltage, you can burn it out instantly. Always match your camera’s voltage range with your drone’s power supply.
Overpaying For Features
4K, super-high TVL, or advanced menu settings are not needed when learning. These can distract from the basics.
Not Securing The Camera
Loose camera mounts cause shaky video and can damage the camera in a crash. Use the correct screws and a bit of foam tape to keep the camera snug.
Forgetting About Latency
High-quality video is nice, but low latency is more important for smooth control.
Real-world Example: Setting Up A Beginner Fpv Camera
Let’s walk through setting up a Runcam Nano 2 on a basic whoop drone.
- Remove the old camera: Unscrew the old camera from the mount.
- Check wiring: The Nano 2 has three wires: power (red), ground (black), and video (yellow).
- Connect wires: Match the wires to your flight controller or video transmitter. Solder or use the included plug.
- Secure the camera: Place the camera in the mount. Use small screws and foam tape to keep it tight.
- Adjust tilt angle: Start with a slight upward tilt (about 10–20 degrees). This helps see forward when flying.
- Test video feed: Turn on the drone and goggles. Check the image for clarity and proper color.
- Fine-tune settings: Many cameras let you adjust brightness and contrast with a small joystick. Try the defaults first.
This process is similar for most beginner cameras.
Two Non-obvious Tips For Beginners
- Carry a spare camera: Crashes happen. A backup camera saves flying time and reduces frustration, especially if you fly with friends.
- Use ND (Neutral Density) filters: If you fly outdoors in bright sunlight, a small ND filter helps reduce glare and makes it easier to see details. These are cheap and easy to attach.
Is The Best Fpv Camera Always The Most Expensive?
No. For beginners, the best FPV camera is one that fits your drone, is easy to install, gives a clear image, and doesn’t break the bank. Many pro pilots learned on cheap cameras and upgraded later. Start simple, then improve as your skills grow.
Where To Buy And Learn More
You can find most beginner FPV cameras at online stores like GetFPV, RaceDayQuads, or Amazon. Always check that the seller is trusted. For more technical details, the First-person view (radio control) Wikipedia page has a good background on FPV systems.
Frequently Asked Questions
What Is The Difference Between Analog And Digital Fpv Cameras?
Analog FPV cameras send video as a simple signal, which most beginner drones and goggles can use. Digital cameras send high-definition video, which is clearer but needs special gear. Analog is cheaper and has less delay, so it’s better for beginners.
How Important Is Low Light Performance For A Beginner Fpv Camera?
If you fly indoors or in the evening, low light performance is important. Cameras like the Caddx Ant handle low light very well. For flying in daylight, almost any camera will work.
Can I Use Any Fpv Camera With My Drone?
No. The camera must fit your drone’s frame and connect to your flight controller or video transmitter. Always check the camera size and wiring before buying.
Should I Upgrade To A Digital Fpv Camera Right Away?
Not usually. Digital systems are more expensive and have a steeper learning curve. Most beginners should start with analog, then upgrade once they are comfortable with flying.
What Is The Best Field Of View (fov) For Learning Fpv?
A FOV between 120° and 150° is ideal for beginners. It lets you see enough of your surroundings but doesn’t distort the image too much. Try a few cameras if you’re unsure—everyone has a personal preference.
Flying FPV opens a new world of excitement. Choosing the right camera makes learning smoother and more fun. Start simple, focus on what matters, and you’ll build skills fast—ready for any adventure in the sky.