
Your camera is likely not turning on because of a depleted power source, a faulty connection, or a mechanical obstruction preventing the boot sequence. While it’s frustrating to find your device unresponsive, most power-related issues stem from simple maintenance oversights rather than permanent hardware failure. By systematically isolating the battery, memory card, and physical controls, you can often restore functionality without needing expensive professional repair services.
Key Takeaways
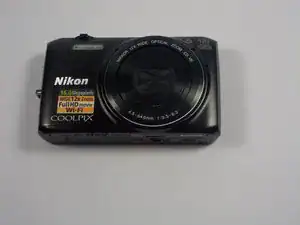
- Ensure your battery is fully seated and contacts are free of debris or oxidation.
- Verify that your battery charger is functional by testing it with a secondary power source or cable.
- Always inspect the memory card slot, as a misaligned card can trigger a safety lockout in many models.
- Check that the battery door is completely closed, as most cameras feature a micro-switch that prevents power-up if the door is slightly ajar.
- Perform a hard reset by removing all power sources for at least ten minutes to discharge internal capacitors.
Why Is My Camera Not Turning On?
When a digital camera refuses to power up, the culprit is usually the energy delivery system. The most frequent cause is a battery that has lost its ability to hold a charge over time, particularly if the device has been in storage for several months.
Additionally, modern cameras have internal safety mechanisms designed to protect sensitive electronics from short circuits. If the camera detects a fault in the battery or the memory card, it will deliberately remain powered off to prevent permanent damage to the motherboard.
Troubleshooting the Battery and Power
Begin your investigation by examining the power supply. Even if you believe the battery is charged, it may be suffering from a high internal resistance that prevents it from delivering the necessary voltage to start the camera.
| Component | Common Issue | Quick Fix |
|---|---|---|
| Battery Contacts | Oxidation or dust | Clean with a dry cotton swab |
| Battery Door | Broken latch or sensor | Ensure it clicks shut firmly |
| Charger Cable | Frayed wire | Try a known good USB cable |
| Power Indicator | Dim or flashing light | Check for battery incompatibility |
Pro Tip: If you have multiple batteries for your camera, test each one individually. If the camera powers on with one battery but not the other, the issue is isolated to the battery cell itself, which likely needs replacement.
Inspecting the Memory Card Slot
Many users overlook the memory card as a source of power failure. If the card is inserted incorrectly or if the card contacts are bent, the camera’s firmware may hang during the initialization process. Remove the SD card completely and attempt to turn the camera on without it.
If the device powers up, the issue is with the card or the card slot. Inspect the pins inside the slot with a flashlight to ensure none are bent or touching each other, as this can cause a short circuit protection trigger.
Checking External Connection Points
If you’re using a camera that supports USB power delivery or charging, verify that the port isn’t clogged with lint or dust. Use a can of compressed air to gently clear out the port. Avoid using metal tools like needles or paperclips, as these can easily damage the delicate internal pins. If you suspect the USB port is damaged, try charging the battery using an external dedicated wall charger rather than through the camera body.
The Importance of Firmware Resets
Digital cameras are small computers that can suffer from software lockups. If the camera’s operating system crashes during a write operation, it may refuse to wake up. To perform a hard reset, remove the main battery and the internal backup battery (if your model has a small coin-cell battery for date and time settings).
Leave the camera in this “dead” state for at least ten minutes. This allows the internal capacitors to drain completely, forcing the system to perform a clean boot when you reinsert the power source.
Environmental Factors and Moisture
Humidity and extreme temperatures significantly impact electronic components. If you have recently used the camera in a cold environment and brought it into a warm room, internal condensation may have formed on the circuit board. This moisture can trigger a safety shutdown.
Place the camera in a sealed bag with a few silica gel packets for 24 hours to ensure all moisture has evaporated before attempting to power it on again. According to the Federal Communications Commission guidelines, you should always handle electronic components with care and follow manufacturer safety protocols when dealing with power-related malfunctions.
Physical Damage and Internal Faults
If you have dropped your camera or if it has suffered a hard impact, the internal ribbon cables connecting the power button to the main logic board may have become disconnected. This is a common issue in compact cameras where the internals are tightly packed.
If the camera makes no sound, shows no lights, and doesn’t respond to any of the aforementioned steps, the problem is likely a broken power circuit. In this scenario, further DIY attempts may result in more damage, and it’s best to consult a professional technician.
Understanding Battery Longevity
Lithium-ion batteries have a limited number of charge cycles. If your camera is several years old, the battery may have reached the end of its chemical life.
A battery that has “died” will often show a full charge on a charger but will drop to zero voltage the moment it’s asked to power the camera’s high-drain components like the LCD screen or the autofocus motor. Purchasing a high-quality OEM replacement battery is often the most cost-effective way to solve what appears to be a major camera failure.
Troubleshooting Comparison Table
| Symptom | Probable Cause | Recommended Action |
|---|---|---|
| Camera warms up but screen stays black | LCD backlight failure | Check if buttons beep or glow |
| No response at all | Battery or power switch | Perform hard reset |
| Blinking error light | Memory card or lens fault | Remove card and lens |
| Camera turns off after one shot | Low voltage battery | Replace the battery pack |
When to Seek Professional Repairs
There’s a clear threshold where DIY troubleshooting ends and professional intervention begins. If you have confirmed that the battery is healthy, the memory card is removed, the contacts are clean, and the device has been reset, but the camera remains unresponsive, you’re facing a hardware-level failure.
Attempting to open the camera chassis yourself is generally discouraged unless you have specialized tools and service documentation, as many cameras contain high-voltage capacitors for the flash that can deliver a painful shock even when the battery is removed.
Frequently Asked Questions
Can a bad memory card prevent a camera from turning on?
Yes, a corrupted or physically damaged memory card can cause the camera’s firmware to hang during the boot sequence. The camera attempts to read the card’s file system as part of its startup routine, and if it encounters a critical error, it may shut down or remain in a frozen state. Always remove the memory card to see if the device powers up normally.
Is it safe to use third-party batteries?
Third-party batteries are generally safe, but they may have different voltage tolerances or lack the communication chips found in original manufacturer batteries. If your camera refuses to turn on with a third-party battery but works with an original one, the camera’s internal software may be rejecting the battery for safety or compatibility reasons. Stick to reputable brands to avoid power-delivery inconsistencies.
Should I use a hair dryer to dry out my camera?
Never use a hair dryer or any heat source to dry your camera. Excessive heat can warp the plastic casing, damage internal seals, and cause delicate electronic components to melt or shift. If you suspect moisture inside the device, use a desiccant like silica gel and store the camera in a dry, cool area for at least 24 hours to allow it to air out naturally.
Why does my camera beep but not turn on?
A beep indicates that the camera has some power and the main logic board is functioning, but it’s encountering a mechanical or software error. This often points to a lens obstruction, a jammed shutter mechanism, or a critical sensor failure. The beep is a diagnostic code from the camera’s internal system; refer to your manual to see if the beep pattern corresponds to a specific error.
Conclusion
If you have tried all the steps above and your device remains unresponsive, it’s time to contact the manufacturer’s support department or a certified repair center. They can perform a diagnostic test on the internal circuit boards to determine if a simple part replacement can restore your camera’s operation or if the unit is beyond economical repair.


1 Comment
Pingback: Why Is My Webcam Not Working on Windows 11? Quick Fixes - BestWildlifeCameras