
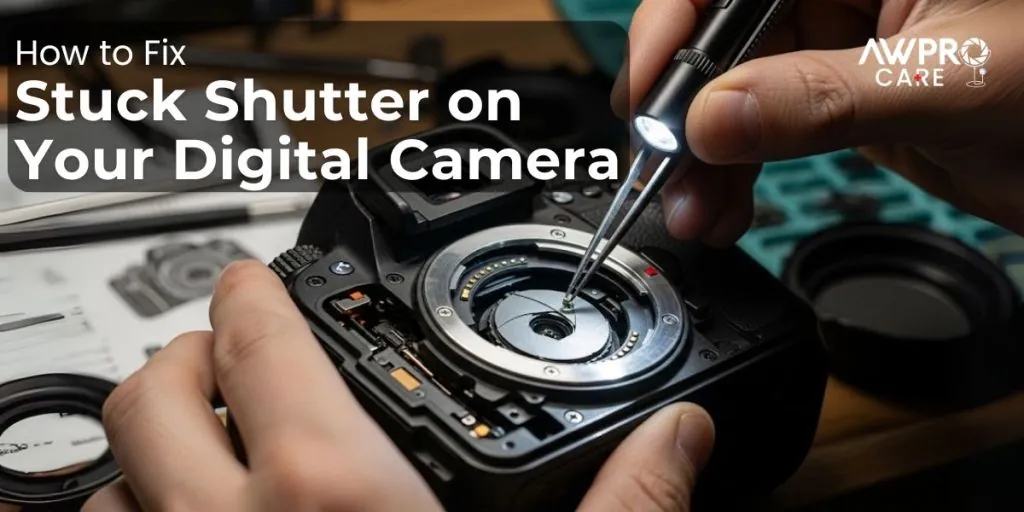
Fixing camera shutter problems typically involves identifying whether the issue stems from a depleted battery, a physical obstruction, or a mechanical failure within the internal housing. When your camera fails to capture an image or displays an error message, the shutter mechanism—a series of curtains or blades that control light exposure—is often the culprit. By systematically checking your power source, inspecting the sensor area, and testing your shooting modes, you can often restore functionality without requiring an expensive professional repair.
Key Takeaways
- Always verify your battery charge level before assuming the shutter mechanism is broken.
- Physical debris or sand inside the mirror box can obstruct shutter curtains.
- Resetting your camera to factory settings can resolve persistent software-related shutter errors.
- Never touch the delicate sensor or shutter blades with your bare fingers.
- Mechanical shutter failure often requires specialized parts available only through authorized service centers.
How to Fix Camera Shutter Problems
When a camera shutter refuses to actuate, the first step is to isolate whether the problem is electrical or mechanical. If you hear a faint clicking sound but no image is recorded, the shutter curtains may be stuck or misaligned.
Conversely, if the camera is completely unresponsive, the issue likely resides in the power delivery system. Power cycle the camera by removing the battery and memory card for at least one minute to clear temporary memory buffers that might be locking the shutter.
Common Signs of Shutter Failure
Identifying the symptoms early can prevent further damage to the camera’s internal components. If you notice a dark band appearing across your images, this is a classic sign of shutter curtain synchronization issues. A completely black frame often indicates that the shutter isn’t opening at all, while a “Shutter Error” message on your LCD screen is a direct diagnostic signal from the camera’s firmware.
| Symptom | Likely Cause | Recommended Action |
|---|---|---|
| Black Frames | Shutter not opening | Check battery voltage |
| Dark Banding | Sync/timing error | Adjust shutter speed |
| Clicking sound | Stuck curtain | Gentle cleaning |
| Error Message | Firmware/Logic fault | Factory reset |
Is Your Battery Actually Charged?
Many users mistakenly believe their shutter is broken when the camera simply lacks the voltage to move the mechanical parts. The shutter mechanism requires a high burst of energy to snap open and shut rapidly. As batteries age, they may still power the LCD screen or the menu system but fail to provide the amperage needed for the physical shutter movement. Test with a fresh battery to rule out power-related malfunctions before proceeding to more complex troubleshooting steps.
Cleaning the Mirror Box Area
Dust and small particles are the primary enemies of a camera’s internal mechanics. If you shoot in outdoor or windy environments, grit can easily find its way into the shutter housing.
Use a manual air blower to gently puff air into the cavity while holding the camera with the lens mount facing downward. This allows gravity to assist in removing debris. Warning: Never use compressed air cans, as the high pressure and chemical propellants can permanently damage the sensitive shutter blades or the image sensor.
Checking for Firmware Glitches
Modern cameras are essentially small computers, and their operating systems can occasionally hang. If the shutter is unresponsive, check the manufacturer’s website to see if there’s a firmware update available. Updating your camera’s internal software can often patch bugs that cause the shutter to lock up during specific operations. You can find the official camera firmware support pages through your manufacturer’s dedicated service portal to ensure you’re running the latest, most stable version of the operating system.
Does Your Lens Cause Shutter Errors?
Sometimes the camera body is functioning perfectly, but the lens creates a communication error that prevents the shutter from firing. If the camera detects an issue with the lens aperture or electronic contacts, it may refuse to release the shutter as a safety precaution.
Clean the metal contacts on both the lens and the camera body using a dry, lint-free microfiber cloth. If the error disappears after removing the lens, the fault lies within the lens electronics rather than the shutter itself.
Evaluating Mechanical Shutter Obstructions
If you have cleaned the contacts and verified the power, you may need to inspect the shutter blades visually. Remove the lens and set the camera to “Sensor Cleaning” mode if available, which lifts the mirror. Look closely at the shutter curtains—do they appear crumpled, bent, or uneven? Warning: Don’t touch the shutter blades with any tools or swabs, as they’re extremely fragile and can be easily bent, which will necessitate a full replacement of the shutter assembly.
Comparing Repair Options vs Replacement
When troubleshooting fails to resolve the issue, you must decide between professional repair and purchasing a new unit. Professional shutter replacement is a labor-intensive process that requires stripping the camera down to its main circuit board. Before committing to a repair, compare the estimated cost against the current market value of your camera body.
| Service Option | Typical Cost Range | Pros | Cons |
|---|---|---|---|
| DIY Cleaning | $0 – $20 | Inexpensive | Risk of damage |
| Factory Service | $200 – $500 | Guaranteed parts | Long turnaround |
| Local Repair Shop | $150 – $400 | Faster service | Variable expertise |
How to Prevent Future Damage
Proper maintenance is the most effective way to avoid shutter issues. Always store your camera in a dry, dust-free environment when not in use. When changing lenses, keep the camera body pointed downward to minimize the amount of dust that can settle on the sensor and shutter mechanism. Additionally, avoid using high-speed continuous shooting modes for extended periods, as this puts significant mechanical stress on the shutter springs and can lead to premature failure.
When to See a Professional

If the camera shows a persistent error code that doesn’t clear after a factory reset, you likely have a hardware failure. Professional repair technicians have access to specialized software that can read internal error logs, which often provide a specific code pinpointing the exact gear or spring that has failed. Attempting to disassemble the camera yourself will almost certainly void your warranty and may cause secondary damage to the delicate internal ribbons and sensors.
Frequently Asked Questions
Why does my camera show a shutter error?
A shutter error typically indicates that the camera’s internal computer has detected a failure in the mechanical movement of the shutter curtains. This can be caused by a physical obstruction, a broken spring, or a failure in the electronic pulse that triggers the shutter. If the error persists after a battery reset, the shutter mechanism likely requires professional repair or replacement.
Can I fix a stuck shutter myself?
You can safely perform basic maintenance like using a manual air blower to remove dust or cleaning the lens contacts. However, attempting to manually move or manipulate the shutter curtains is highly risky. These components are extremely thin and delicate; even a minor touch can cause permanent damage, turning a simple cleaning issue into a costly mechanical repair that requires an authorized technician.
Is it worth repairing an old camera?
Whether repair is worth it depends on the cost of the shutter replacement compared to the current resale value of the camera. If your camera is a high-end professional model, a shutter replacement is often a sound investment. For entry-level cameras, the cost of labor and parts may exceed the value of the camera, making a replacement body a more logical financial choice.
How long should a camera shutter last?
The lifespan of a shutter is measured in “actuations,” which is the number of times the shutter fires. Entry-level DSLRs are often rated for 50,000 to 100,000 actuations, while professional-grade bodies are frequently rated for 300,000 to 500,000. While many shutters exceed these ratings, they’re mechanical parts that will eventually wear out, similar to the engine of a car after heavy usage.
Does exposure to moisture damage shutters?
Yes, moisture is particularly harmful to camera shutters. High humidity can lead to corrosion on the small electronic contacts or cause the lubricants within the shutter assembly to thicken or dry out. If your camera has been exposed to moisture, ensure it’s thoroughly dried in a controlled environment before attempting to fire the shutter, as moisture can cause short circuits within the internal motor.
Conclusion
If your camera remains unresponsive after these troubleshooting steps, check the manufacturer’s website for a list of authorized service centers in your area. Don’t continue to force the shutter button if you hear grinding or abnormal noises, as this can worsen the mechanical damage. Contact a professional repair service to receive a formal estimate and restore your equipment to proper working order.



4 Comments
Pingback: How to Fix Camera Overexposure Problems: Simple Adjustments
Pingback: How to Fix a Camera With a Stuck Shutter: Quick Solutions
Pingback: How to Fix a Camera That Produces Blurry Videos: Quick Steps
Pingback: Why Is My Camera Lens Fogging Up? How to Fix Condensation