
You can fix a camera that won’t charge by addressing simple power flow disruptions like loose connections, dead batteries, or faulty cables. When a device fails to show a charging indicator, the problem is usually in the external power delivery rather than the internal circuitry. Systematically checking your hardware helps you identify whether the issue lies with the power source, cable, battery, or connection port.
Key Takeaways
- Always inspect the charging cable for physical damage like fraying or bent pins.
- Try a different power outlet or USB wall adapter to isolate external electrical issues.
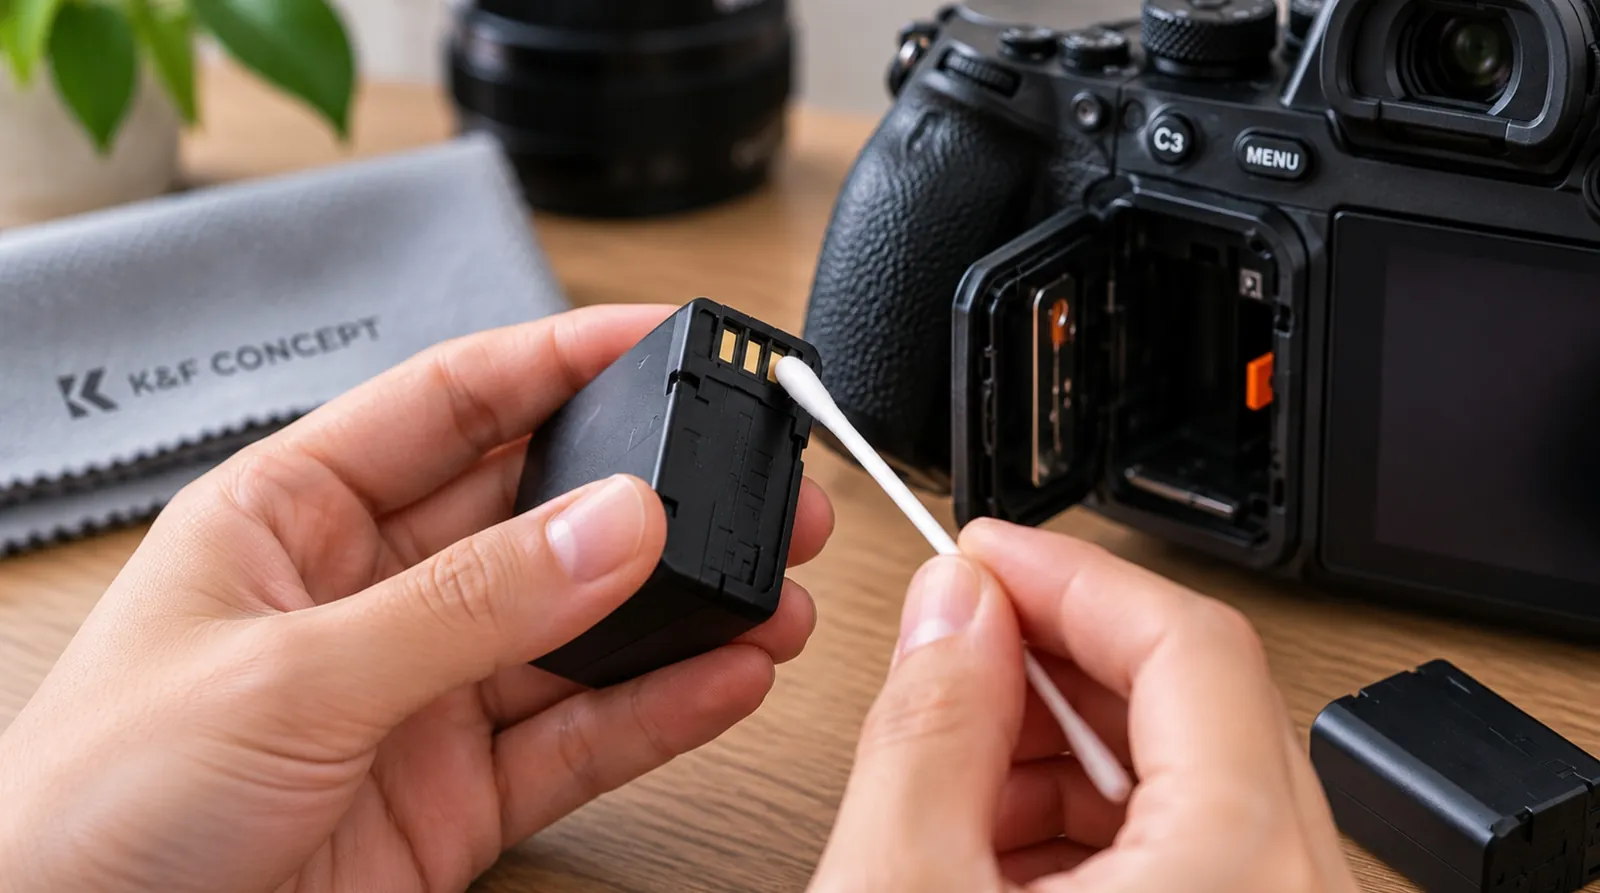
- Clean the metal battery contacts using a soft cloth or a dry cotton swab.
- Verify that your battery isn’t suffering from long-term voltage depletion.
- Consult your camera manual to confirm you’re using the correct voltage and amperage.
Troubleshooting Steps for Power Issues
When your equipment fails to draw power, start with the most accessible components. If the camera uses a removable battery, remove it and check for any debris inside the compartment. Often, a small piece of lint or dust can prevent the battery from making a secure connection with the internal pins. Use a clean, dry cloth to gently wipe the gold contact points on both the battery and the camera.
Warning: Never use metal tools or liquids to clean the battery terminals, as this can cause a short circuit or damage the sensitive electronic components of your camera.
If the camera charges via a USB cable, try swapping the cable with one you know works with another device, such as a smartphone. USB cables often fail internally without showing exterior signs of wear. Furthermore, verify the power source; plugging your camera into a computer USB port may not provide enough amperage to charge a high-capacity battery effectively. Using a dedicated wall adapter that meets the manufacturer’s specifications is a more reliable method to ensure consistent energy delivery.
How to Fix a Camera That Won’t Charge
Fixing a charging issue requires a logical process of elimination. You should test every link in the power chain to ensure current is flowing correctly. If the camera body has a dedicated charging light, observe its behavior. A blinking light often indicates a specific error code, such as a temperature warning or a communication failure between the battery and the camera firmware.
| Troubleshooting Method | Action Required | Expected Result |
|---|---|---|
| Cable Swap | Replace existing USB cord | Charging indicator activates |
| Port Inspection | Check for bent pins/lint | Secure physical connection |
| Battery Reset | Remove and reinsert cell | Proper circuit contact |
| Wall Adapter Test | Use a higher output plug | Constant power flow |
Signs Your Battery Is Failing
Batteries have a finite lifespan and will eventually lose their ability to hold a charge. If your battery feels unusually warm during the charging process, or if it appears physically swollen or deformed, stop using it immediately. A swollen battery is a significant safety risk and should be disposed of according to local hazardous waste regulations.
Pro Tip: If your camera has been sitting idle for several months, the battery may have entered a deep discharge state. Leave it plugged into a charger for at least six hours, as some smart chargers require time to detect a battery that has dropped below its standard operating voltage.
Signs of a failing battery include a rapid drop in charge percentage during use or an inability to power the camera even after hours of charging. If you have multiple batteries, test a different one in your camera. If the second battery charges normally, the issue is isolated to the first battery.
Common Causes of Charge Failure
Understanding why power isn’t being received helps prevent future issues. Most failures are caused by environmental factors or improper handling of charging accessories.
- Oxidation: Moisture can cause corrosion on battery contacts over time.
- Voltage Mismatch: Using an incompatible wall adapter that doesn’t provide enough power.
- Software Glitches: A temporary freeze in the camera’s internal management system.
- Physical Port Damage: Frequent plugging and unplugging can loosen the internal soldering of the USB port.
The Consumer Product Safety Commission provides specific guidance on the safe handling and storage of lithium-ion batteries to prevent hazards like overheating or leakage. Adhering to these safety standards is essential when dealing with any rechargeable electronic device.
Evaluating the Charging Port
The charging port on your camera is a delicate component. If you notice the cable feels “loose” or wobbly when inserted, the internal connector may be detached from the motherboard. Avoid forcing the cable into the port, as this can bend the tiny pins inside. If you see bent pins, you may need a professional repair service to replace the port.
Assessing Physical Port Damage
- Inspect the interior of the port with a bright flashlight.
- Check for any debris or obstructions using a non-conductive tool like a wooden toothpick.
- Look for signs of discoloration, which may indicate short-circuiting or water damage.
- Confirm the cable connector aligns perfectly with the port guide rails.
Testing External Power Sources
Sometimes the problem isn’t the camera, but the electricity supply. If you’re using a power bank, ensure it’s fully charged and capable of providing the necessary output for your specific model. Some cameras require a specific “Power Delivery” (PD) standard to charge via USB-C. If your power bank doesn’t support this protocol, the camera will ignore the connection entirely.
| Power Source Type | Recommended Use | Potential Limitation |
|---|---|---|
| Wall Adapter | Primary charging method | Requires correct voltage rating |
| Computer USB | Data transfer only | Often provides insufficient current |
| Portable Power Bank | Field charging | Must support PD protocols |
| Car Charger | Emergency use | Risk of unstable voltage spikes |
When to Seek Professional Repairs
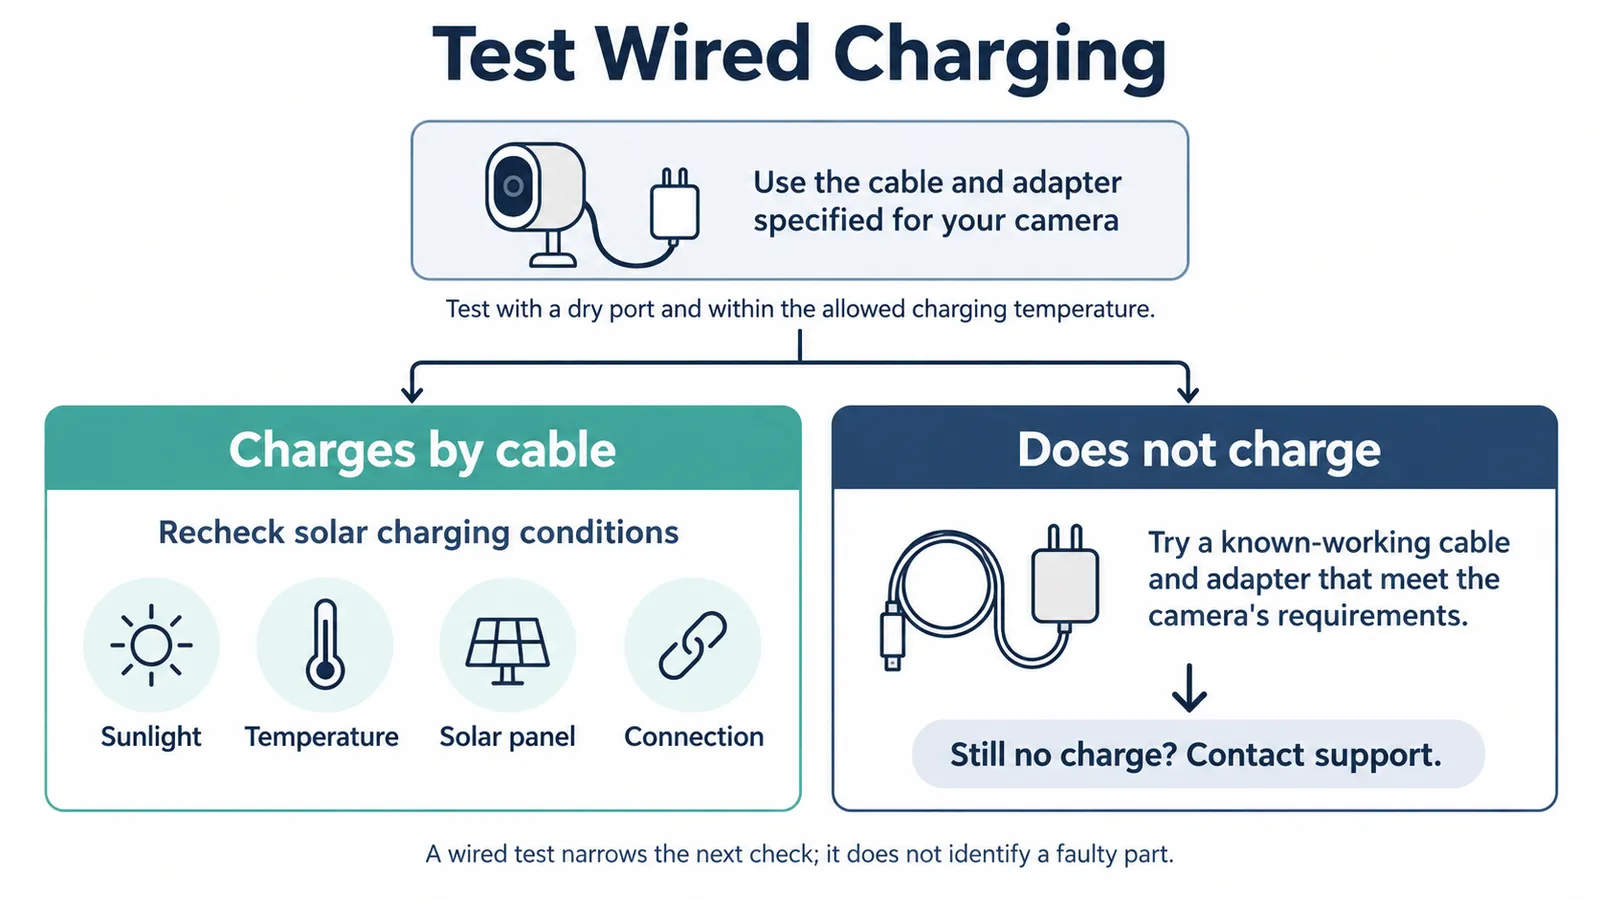
If you have tried multiple cables, verified the battery health, cleaned the contacts, and tested different power sources without success, the issue is likely internal. Internal motherboard failures or damaged charging ICs (integrated circuits) require specialized tools and technical expertise to fix.
Attempting to disassemble a camera housing on your own can lead to accidental damage to the sensor or the delicate ribbon cables that connect the screen and buttons. If your device is still under warranty, contact the manufacturer directly to arrange for a professional repair. Attempting an unauthorized repair will almost certainly void your manufacturer warranty.
Frequently Asked Questions
Why does my camera show a charging light but not turn on?
This often indicates that the battery has enough power to trigger the charging circuit but not enough to boot the camera system. Leave the device plugged in for several hours. If the camera still fails to power on, the internal battery management system might be faulty or the battery capacity has degraded below the minimum threshold required for operation.
Can I use a phone charger to charge my camera?
You can use a phone wall adapter provided the voltage and amperage match the requirements listed on your camera or in the manual. Most modern USB chargers are designed to be “smart” and will negotiate the correct power output, but using an extremely low-power adapter may result in very slow charging or an error message on the camera screen.
How do I know if my battery is dead?
A dead battery typically exhibits signs like inability to hold a charge, rapid overheating during the charging cycle, or physical swelling of the casing. If the battery doesn’t show any charge after being left on the charger overnight, and other batteries work fine in the same camera, the battery cell itself has likely reached the end of its life cycle.
Is it safe to leave my camera charging overnight?
Most modern cameras and batteries contain internal circuitry designed to stop the flow of power once the battery reaches full capacity. While this is generally safe for high-quality, original-brand batteries, it’s still best practice to unplug devices once they’re fully charged to minimize the risk of electrical surges and to prolong the overall health of the lithium-ion cells.
Why is my camera charging slowly?
Slow charging is usually caused by using a power source with insufficient output, such as a laptop USB port or a low-wattage wall adapter. Additionally, if the ambient temperature is extremely hot or cold, the camera’s safety sensors may intentionally throttle the charging speed to prevent damage to the battery chemistry. Ensure you’re charging in a room-temperature environment.
Conclusion
If you have completed all the troubleshooting steps outlined above and your device remains unresponsive, the most effective next step is to consult your camera’s user manual for the specific manufacturer’s reset procedure. If that fails, contact the manufacturer’s customer support department to discuss potential repair options or battery replacement services, as internal hardware issues usually require expert intervention.


1 Comment
Pingback: Why Does My Camera Keep Shutting Off? Simple Fixes