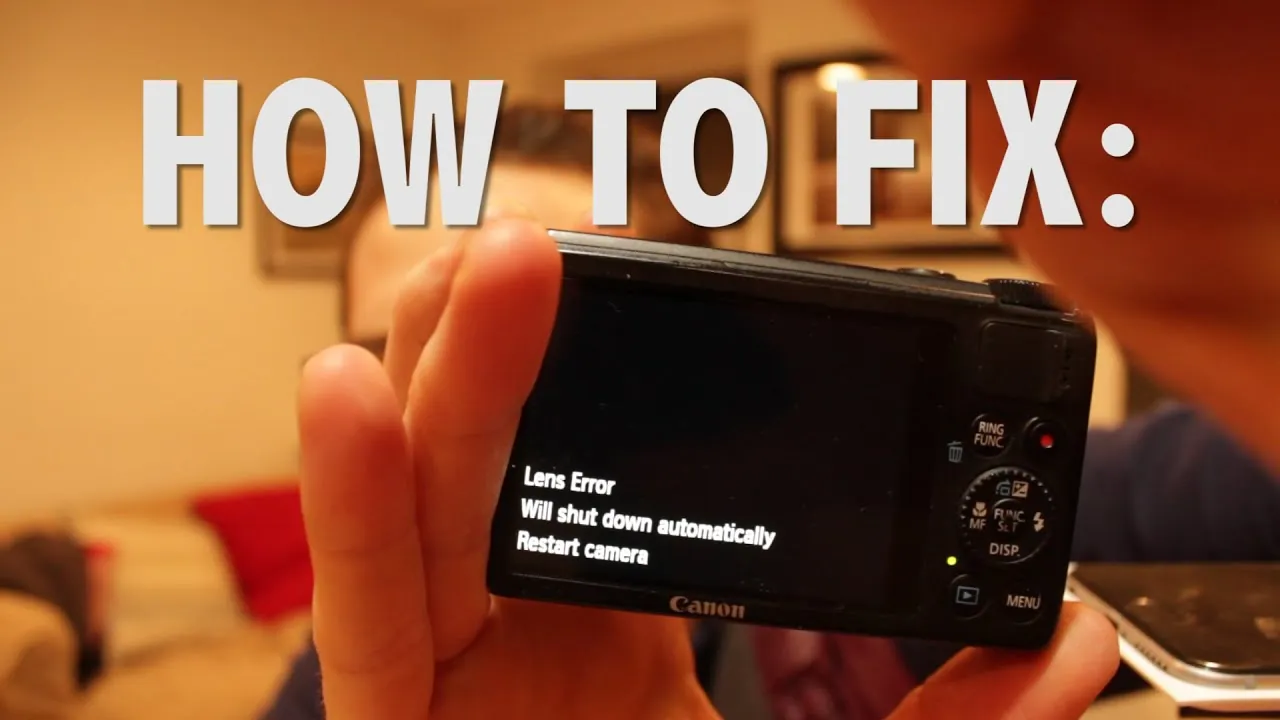
Fixing a camera lens error usually involves a combination of power cycling, battery management, and gentle mechanical inspection to resolve obstructions preventing the lens barrel from extending or retracting. This common digital camera malfunction often stems from grit, minor physical impacts, or a depletion in voltage that prevents the internal motors from completing their mechanical cycle. By systematically addressing the electrical and physical components of your device, you can often restore full functionality without needing professional intervention.
Key Takeaways
- Always remove the battery and memory card before attempting any physical cleaning or inspection.
- Compressed air is the safest method for removing debris from the lens barrel seams.
- Avoid applying force to the lens barrel, as internal plastic gears are easily stripped.
- Checking the battery voltage is the first step, as low power often triggers false error codes.
- Professional repair is necessary if the internal ribbon cable has been severed by a drop.
How to Fix a Camera Lens Error
When your camera displays an error code, the primary objective is to reset the electronic communication between the lens motor and the main processor. Start by turning the camera off and removing the battery for at least sixty seconds. This allows the internal capacitors to discharge fully, clearing any temporary software glitches. Reinsert a fully charged battery and attempt to power the camera on while holding it in an upright position, which helps the gravity-assisted gears move more freely.
Why Does My Lens Get Stuck?
Most lens errors are caused by environmental factors or mechanical wear. If you frequently use your camera in dusty or sandy environments, microscopic particles can lodge in the gear tracks of the telescopic lens barrel.
Furthermore, small impacts against hard surfaces can cause the lens housing to shift slightly out of alignment. Even a deviation of less than a millimeter can prevent the motorized sensor from confirming the lens is in the correct position, resulting in the camera shutting down to protect the delicate internal mechanisms.
| Cause Type | Typical Symptom | Recommended Action |
|---|---|---|
| Debris/Grit | Grinding or clicking noise | Use compressed air |
| Low Battery | Slow extension or shutdown | Recharge or replace cell |
| Physical Impact | Lens barrel crooked | Send to manufacturer |
| Software Glitch | Screen frozen on boot | Perform hard reset |
Troubleshooting Through Power Cycles
If the initial reset fails, perform a “hard” power cycle. Leave the battery out for ten minutes and ensure the memory card is removed. Sometimes, a corrupted file on the memory card can cause the camera software to hang during the boot sequence, specifically when the lens attempts to read the card’s directory.
By starting the camera without the card, you isolate the lens mechanism from external software conflicts. If the lens extends successfully, you know the mechanical hardware is functional and the issue likely lies with the storage media.
Cleaning the Lens Barrel Seams
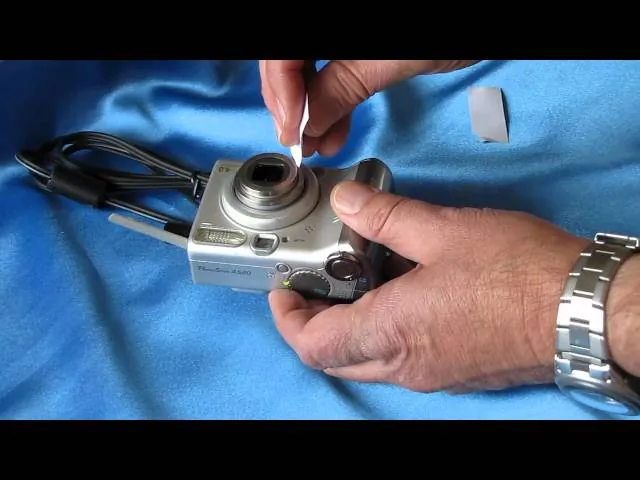
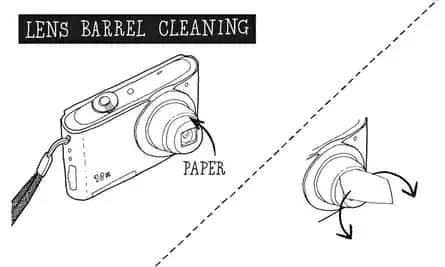
When debris is the suspected culprit, you must clean the gaps where the lens sections meet. Use a soft, dry toothbrush to gently brush around the circumference of the lens while it’s in the “error” position.
You can also use a bulb-style air blower to force air into the seams, which helps dislodge fine particles. Warning: Never use pressurized canned air directly against the lens assembly, as the propellant chemicals or the extreme force can damage the internal optical coating or drive moisture into the sensor housing.
Can You Manually Align the Lens?
Applying manual force to a stuck lens is inherently risky. While some users attempt to gently push or pull the lens barrel to help it retract, this should only be done if you’re comfortable with the possibility of damaging the plastic guide pins.
If you feel resistance, stop immediately. These pins are designed to slide within internal grooves; if they jump the track, the lens will likely require a full teardown by a technician. Instead of pushing, try tapping the side of the camera body lightly with your palm to see if a small vibration helps the motor find its home position.
Inspecting for Internal Damage
If your camera suffered a drop, look for signs of a bent lens barrel. Even if the camera powers on, a slight misalignment can cause the lens to draw too much current, triggering an automatic safety shutdown.
You can verify this by looking at the lens from the side; if one side of the barrel extends further than the other, the internal cam gear has likely suffered a mechanical failure. In these instances, the device requires professional repair, as the Canon repair guidelines emphasize that attempting to force misaligned components often destroys the drive motors and sensor mounts.
Battery and Power Requirements
Voltage stability is vital for motorized lens operation. As lithium-ion batteries age, their ability to provide the high-current burst required to move the lens barrel diminishes. Even if the battery appears to have enough charge to power the LCD screen, it may fail to provide the amperage needed to move the lens.
Test your camera with a brand-new or known-good battery before assuming the lens motor is broken. This simple swap resolves a surprising number of “mechanical” errors that are actually power-related.
When Is Professional Help Required?
There are specific signs that indicate the camera has reached a state beyond DIY repair. If you hear a loud, repetitive clicking sound, it indicates that the plastic teeth on the internal gears have been stripped.
Once these gears are compromised, the lens can’t reliably extend or retract, and the motor will continue to spin in vain. Additionally, if the camera screen displays a specific error code that persists even after a factory reset, the internal ribbon cable connecting the lens to the motherboard may be damaged or disconnected.
| Service Level | Typical Cost Range | Primary Benefit |
|---|---|---|
| Warranty Repair | Zero cost | Original parts/labor |
| Independent Shop | $100 – $200 | Faster turnaround time |
| Manufacturer Depot | $200 – $400 | Full calibration/testing |
Common Mechanical Failure Signs
- The lens extends and retracts repeatedly without stopping.
- A persistent grinding noise occurs during the startup sequence.
- The lens barrel remains stuck in an angled or tilted position.
- The camera powers off immediately after the lens begins to move.
- Visible cracks appear on the exterior plastic housing near the lens.
Frequently Asked Questions
Will a factory reset fix the lens?
A factory reset typically affects software settings like date, time, and image quality preferences. It doesn’t mechanically move a stuck lens barrel. However, if the error is caused by a corrupted firmware state preventing the lens motor from receiving the “start” command, a reset can sometimes clear the communication block. Always try this before attempting any physical disassembly of the camera body.
Is it safe to use lubricant on the lens?
No, never use oil, silicone spray, or any lubricant on a camera lens. These substances attract dust and grit, which will create a sticky paste inside the lens barrel that accelerates wear. Furthermore, lubricants can easily migrate onto the internal optical elements or the image sensor, causing permanent damage to your photos that’s nearly impossible to clean without professional equipment.
Can I fix a lens error caused by sand?
Sand is the most difficult contaminant to remove because it’s abrasive and can lock the gears instantly. You can try using a vacuum cleaner with a brush attachment on the lowest setting to pull particles out of the seams, but don’t force the vacuum nozzle against the glass. If the grinding noise continues, stop immediately to prevent the sand from scoring the barrel plastic.
What if the camera is out of warranty?
If your device is out of warranty, you must weigh the cost of a professional repair against the current market value of the camera. Most manufacturer repair centers have a flat-rate fee for lens assembly replacement. Check if the manufacturer offers a “repair estimate” service, which allows you to pay a small fee to have a technician diagnose the unit before committing to the full repair cost.
How do I prevent lens errors in the future?
Prevention centers on storage and handling. Always use a dedicated camera bag with padding to prevent accidental impacts. When shooting outdoors, keep the camera in a sealed bag during transit to minimize exposure to dust and humidity. Finally, retract the lens fully before turning the camera off, and never force the camera into a tight pocket where the lens barrel might be compressed.
Conclusion
If these steps don’t resolve the issue, check your camera’s specific manual for a list of error codes, as some models provide a precise diagnostic message indicating if the fault is with the zoom motor or the focus sensor. For most users, a professional repair service is the safest next step to ensure the delicate optics aren’t permanently damaged by continued use.