
A camera lens failing to zoom typically results from a mechanical obstruction, a motor failure, or a firmware communication error between the lens and the camera body. When your zoom ring feels stiff, gritty, or completely locked, it’s often a sign that internal components have become misaligned or that debris has entered the barrel. While some issues are simple to resolve with basic maintenance, others indicate internal damage that requires professional intervention. By systematically checking your equipment, you can distinguish between a minor fixable issue and a hardware failure that needs expert repair.
Key Takeaways

- Check the lens barrel for visible dents or sand that could physically jam the zoom mechanism.
- Toggle the manual and autofocus switches on the side of the lens to reset the internal gear engagement.
- Remove the lens from the camera body and clean the electronic contact points with a dry, lint-free cloth.
- Update your camera’s firmware, as software bugs can occasionally cause lens motor communication failures.
- Avoid forcing a stuck zoom ring, as this can permanently damage the internal helicoid threads.
Why Is My Camera Lens Not Zooming?
Most zoom issues stem from physical impact or environmental exposure. If you recently dropped your camera or used it in a dusty, sandy environment, the zoom mechanism is likely suffering from mechanical trauma.
Internal lenses move on a series of tracks; if one track bends even slightly due to a drop, the entire assembly will bind. Similarly, fine grit can act like sandpaper, seizing the internal gears. Physical obstruction is the most common culprit when the zoom ring stops at a specific focal length but moves freely elsewhere.
Troubleshooting Mechanical Resistance
If the zoom ring feels physically heavy or makes a grinding noise, stop attempting to force it immediately. Forcing the ring can strip the plastic teeth on the internal gears or snap the guide pins that hold the lens elements in place.
Inspect the front element and the seams of the zoom barrel for any signs of debris. If you see grit, don’t use compressed air, as this can blow particles deeper into the lens interior. Instead, use a soft-bristled brush to gently sweep the edges of the barrel while rotating the ring slowly.
| Symptom | Potential Cause | Immediate Action |
|---|---|---|
| Grinding noise | Sand or grit intrusion | Stop, brush exterior, test |
| Stuck at one end | Bent guide pin | Send for professional repair |
| Ring spins freely | Stripped internal gear | Seek authorized service center |
| Stiff at one focal point | Debris in zoom track | Clean barrel seams gently |
Checking Electronic Connections
Sometimes, a lens that refuses to zoom is actually suffering from a software-level communication breakdown. Modern lenses are “fly-by-wire” in many instances, meaning the ring sends a signal to a motor rather than moving the glass directly. If the lens isn’t communicating with the camera, the motor may not engage.
Start by detaching the lens and inspecting the gold-plated pins on the mount. If they appear dirty or oxidized, wipe them clean with a dry, microfiber cloth. Electronic contact maintenance is a simple step that often resolves “Lens Not Detected” errors that prevent zoom operation.
Impact of Firmware Updates
Camera manufacturers frequently release firmware updates to improve compatibility and fix bugs in lens-to-body communication. If your lens motor is failing to receive the correct signal to initiate the zoom movement, the software might be the bottleneck. Visit the official support page for your specific camera model to see if there’s a pending update.
According to the Canon support documentation for lens maintenance, keeping your equipment clean and updated is essential for preventing motor communication errors. Always ensure your battery is fully charged before performing an update to avoid a mid-process failure.
When to Seek Professional Repair
Not every zoom failure can be fixed at home. If you hear a high-pitched whine when you try to zoom, the internal focus or zoom motor has likely failed electrically. This requires specialized tools to disassemble the lens barrel without damaging the sensitive optical alignment.
Attempting to open a lens yourself often voids warranties and risks introducing dust onto the sensor or internal elements. If the lens is under warranty, contact the manufacturer or an authorized service center to avoid unauthorized repair costs.
Assessing Lens Barrel Damage
| Damage Type | Repairability | Estimated Complexity |
|---|---|---|
| Minor sand/grit | High (Cleaning) | Low |
| Misaligned track | Low (Replacement) | High |
| Broken gear teeth | Low (Replacement) | High |
| Loose zoom ring | Medium (Tightening) | Medium |
Preventing Future Zoom Issues
To keep your lens functioning smoothly, store your gear in a climate-controlled environment, ideally with silica gel packets to prevent fungus growth. Fungus can grow between lens elements and eventually seize the zoom mechanism by creating sticky residue.
When changing lenses in the field, always point the camera mount downward to prevent dust from settling on the internal glass or the lens mount contacts. Using a high-quality UV filter also protects the front element from impact, which is a frequent cause of barrel distortion that leads to zoom failure. Preventive maintenance habits will significantly extend the life of your optical equipment.
Understanding Zoom Motor Failure
If the lens is a “power zoom” model, it relies entirely on a small electric motor to move the glass. Unlike manual zooms, these lenses have no physical connection to the ring. If the motor dies, the ring will spin without moving the lens.
Listen closely for a clicking sound, which indicates the motor is trying to engage but can’t move the glass assembly. This is almost always a hardware failure. Motor assembly replacement is a standard service procedure that requires a technician to calibrate the lens after installation to ensure focus accuracy.
Identifying Internal Lens Fungus
Fungus is a silent killer of camera lenses. It thrives in humid conditions and can spread across the internal glass elements, eventually reaching the grease that lubricates the zoom tracks. Once this grease is contaminated, it becomes tacky and gummy, causing the zoom ring to seize. If you look through the lens with a flashlight and see web-like structures, you have a fungus issue. This isn’t a user-fixable problem and requires professional cleaning or, in severe cases, lens element replacement.
Exercises for Smooth Operation
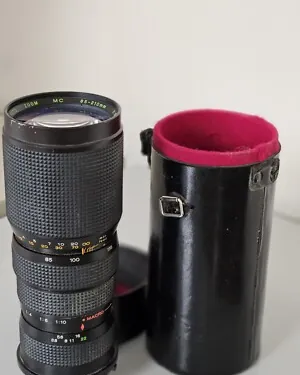
If your lens has been sitting in storage for a long time, the internal lubricants may have settled or thickened. Periodically exercising the zoom ring can help redistribute these lubricants. Gently rotate the zoom ring from the widest setting to the longest focal length and back again ten times. Do this slowly and smoothly. This practice keeps the internal lubricant distribution consistent and ensures that no single part of the track becomes dry or sticky over time.
Frequently Asked Questions
Can I use WD-40 to fix a stuck zoom ring?
Never use WD-40 or any other household lubricant on a camera lens. These substances are too thin and will migrate into the optical elements, permanently damaging your glass and the internal electronic sensors. They can also degrade the plastic components inside the barrel. Only use professional-grade lubricants applied by a trained technician during a full service.
Why does my lens zoom only halfway?
A lens that stops mid-zoom usually has a physical obstruction or a bent guide pin inside the barrel. This prevents the internal track from completing its full rotation. Don’t force the ring past the point of resistance, as this will likely break the guide pin or strip the internal gear teeth, turning a minor repair into a total replacement.
Is it safe to open the lens casing myself?
Opening a lens casing is extremely risky. Lenses are calibrated with precision to the micrometer; even a slight misalignment during reassembly will result in permanently soft or blurry images. Furthermore, the internal capacitors in some lenses can hold an electrical charge even when the battery is removed, posing a risk of shock. Always leave internal repairs to a professional.
How much does professional lens repair cost?
Repair costs vary wildly based on the brand, the severity of the damage, and whether the motor or the optical glass needs replacement. Simple cleanings might cost a small fee, while motor replacements or barrel repairs can cost hundreds of dollars. It’s always wise to request a quote from an authorized repair shop before authorizing any work on your equipment.
Can a firmware update fix a mechanical jam?
No. Firmware updates only address communication issues between the lens and the camera body. If the zoom ring is physically blocked by grit, a bent pin, or a broken gear, software can’t move the physical glass. Firmware is only relevant if the lens is unresponsive or displays an error code on the camera screen despite being physically clear of obstructions.
How do I know if the zoom motor is dead?
If you hear a high-pitched motor sound but the lens doesn’t zoom, or if there’s no sound at all despite the camera trying to activate the lens, the motor is likely dead. A functional motor will move the glass smoothly without grinding. If the motor has failed, the lens will require a professional replacement of the internal drive unit.
Conclusion
Taking care of your camera lens requires a balance of environmental awareness and gentle handling. If your lens remains unresponsive after checking the external contacts and updating your firmware, it’s time to consult a repair professional. By addressing minor issues early and keeping your gear clean, you can prevent the most common causes of zoom failure and ensure your equipment remains reliable for years of photography.