Mounting night vision goggles (NVGs) on a helmet can feel confusing, especially if you are new to tactical gear. Whether you are a hobbyist, a security professional, or part of a search and rescue team, knowing the right way to attach NVGs is essential for safety and performance. The process involves more than just clicking a device onto your helmet; you need to choose the correct mount, balance the weight, and adjust for comfort and clarity. In this guide, you will learn everything you need to know about mounting night vision goggles on a helmet, step by step, with practical tips and real-world advice.
Understanding Night Vision Goggle Mounting Systems
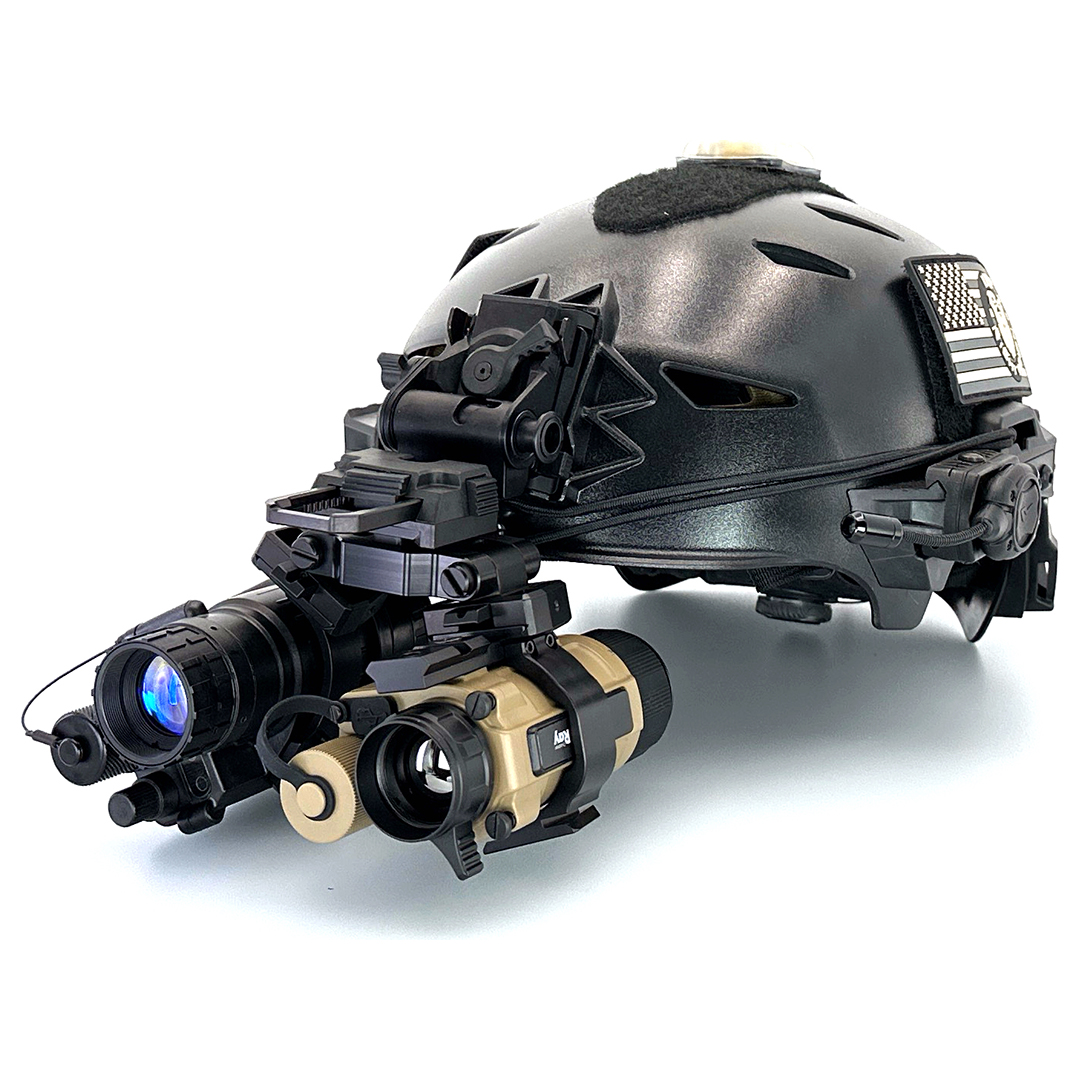
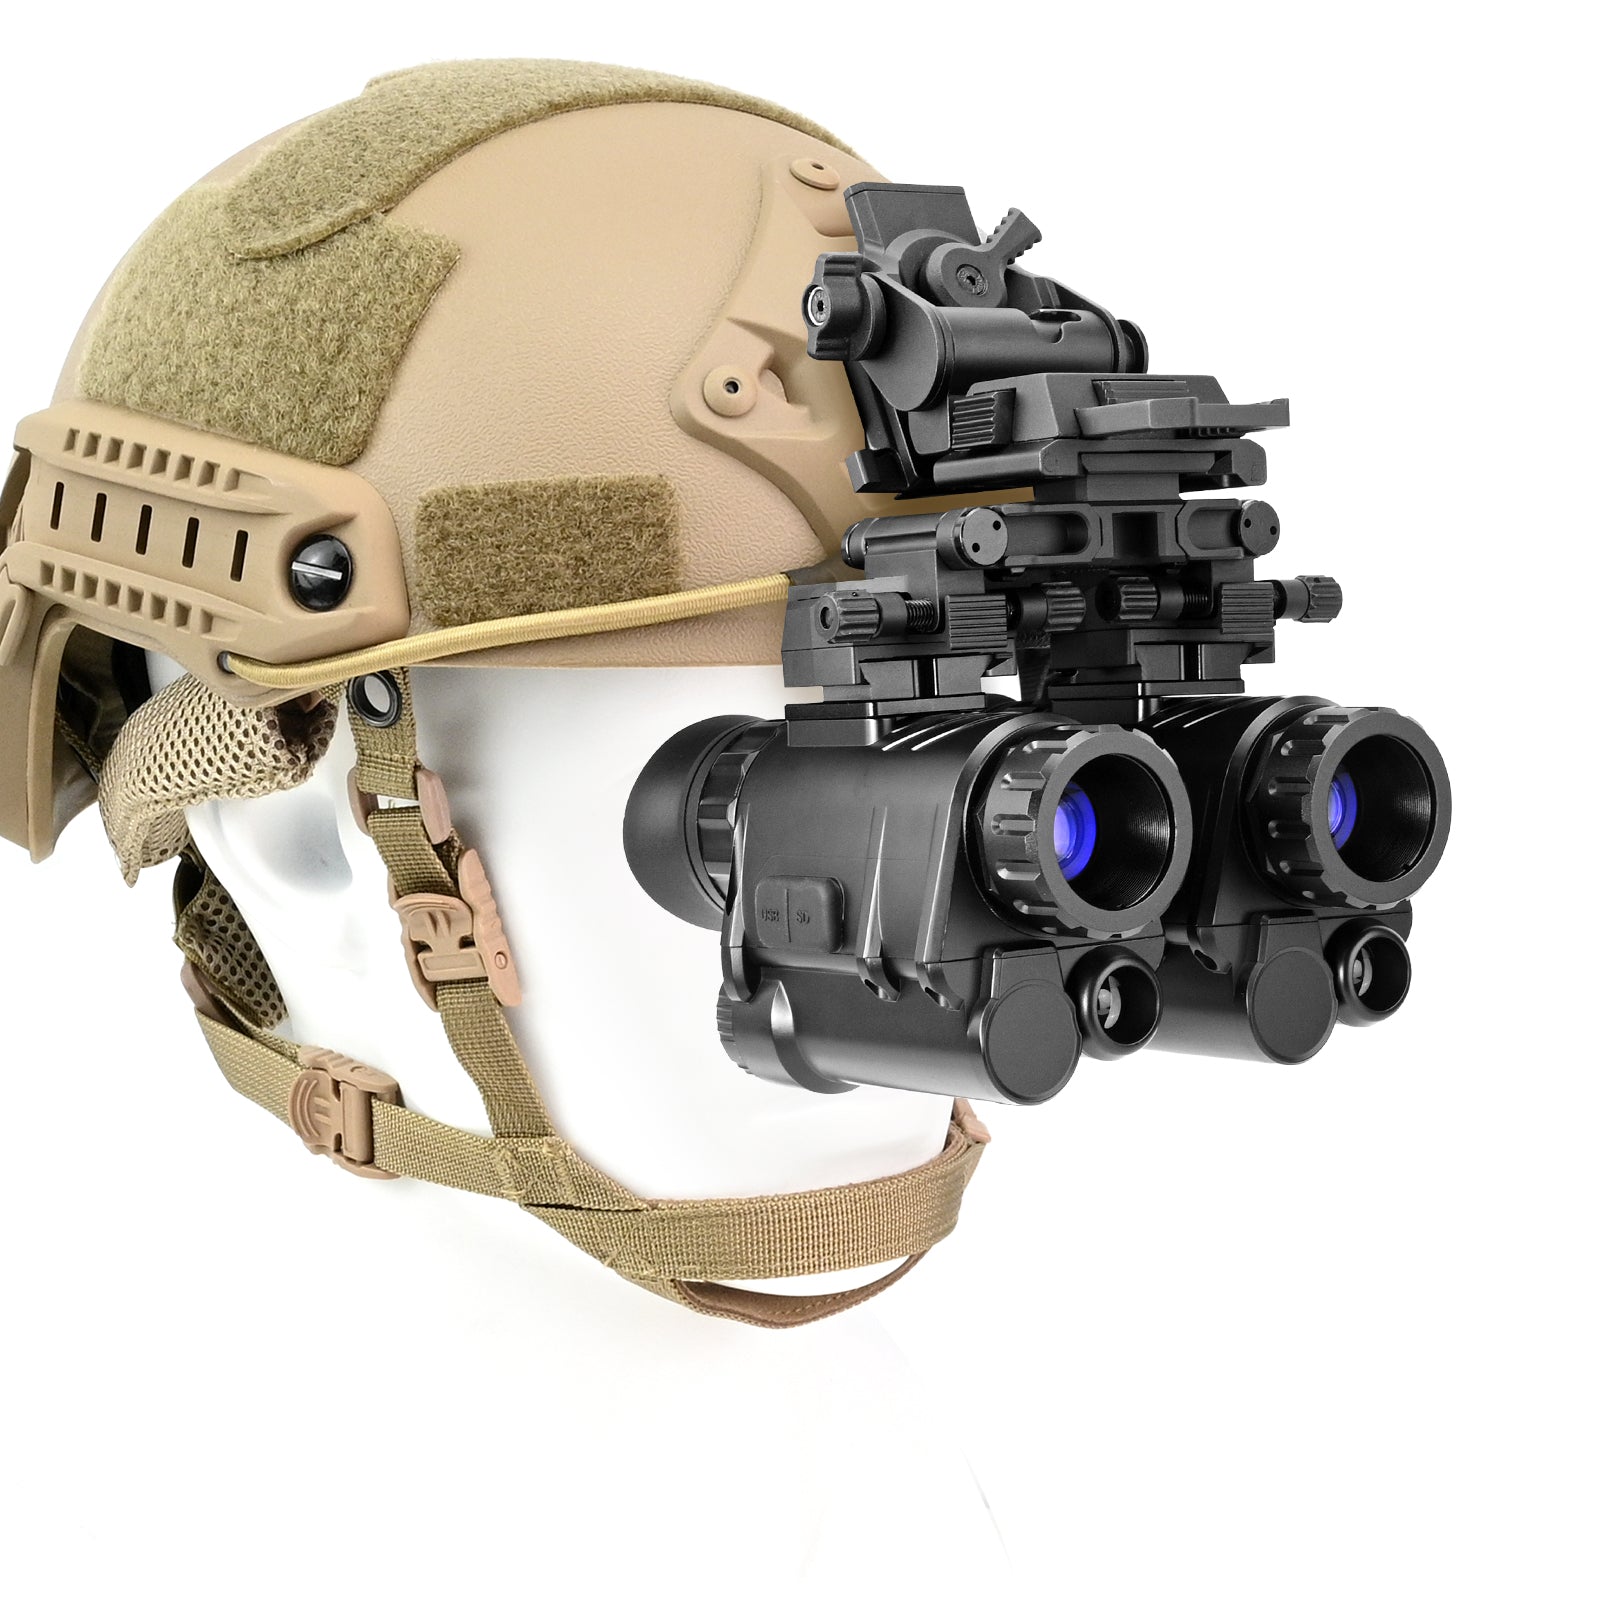
Before you start attaching anything, it’s important to know the main components involved in helmet-mounted NVG setups. There are three key pieces: the helmet, the mounting shroud (or bracket), and the goggle mount (often called the arm or bridge).
Key Components And Their Functions
- Helmet: The base that supports all other parts. It must be sturdy and properly fitted to your head.
- Mounting shroud: The fixed bracket on the front of the helmet. It serves as the anchor point for the NVG mount.
- NVG mount/arm: This connects the goggles to the shroud and allows you to flip the goggles up or down.
Different helmets and NVGs use different mounting systems. The most common systems are Wilcox L4 shrouds, Norotos Rhino mounts, and Bayonet-style mounts. Always check what your helmet and NVGs are compatible with before buying any parts.
Why Compatibility Matters
Choosing the wrong mount can lead to poor fit, discomfort, or even damage your goggles. For example, military-standard PVS-14 goggles use a J-arm mount, while dual-tube NVGs like PVS-15 or PVS-31 often require a dovetail-style mount. If you try to force a mismatched system, you could drop your expensive gear or risk injury.
Choosing The Right Helmet
Not every helmet is suitable for night vision. A proper helmet must be rugged, lightweight, and have a front shroud. The most popular choices are ballistic helmets and bump helmets.
Types Of Helmets Used With Night Vision
| Helmet Type | Protection Level | Typical Use | Weight |
|---|---|---|---|
| Ballistic Helmet | High (stops bullets/shrapnel) | Military, SWAT | 1.2–1.6 kg |
| Bump Helmet | Low (protects from impacts) | Airsoft, Search & Rescue | 0.6–1.2 kg |
| Climbing Helmet | Minimal | Outdoor Sports | 0.4–0.7 kg |
Ballistic helmets are heavier but offer more protection. Bump helmets are lighter and more comfortable for long periods but do not stop bullets.
Helmet Fit And Stability
A helmet must fit snugly but not too tight. Use the adjustment pads or dial system to ensure minimal movement when you shake your head. A loose helmet can cause the NVGs to wobble, making it hard to see and increasing the risk of dropping the device.
Selecting The Right Mount And Shroud
Your helmet might already have a shroud installed, but it’s important to check if it matches your NVG mount. The shroud is the small metal or polymer bracket at the helmet’s front.
Common Shroud Types
| Shroud Type | Main Feature | Compatible Mounts |
|---|---|---|
| Three-hole shroud | Very secure, military standard | Wilcox, Norotos |
| One-hole shroud | Quick install, less robust | Basic NVG mounts |
| Integrated shroud | Built into helmet shell | Specific to helmet model |
If your helmet has no shroud, you can usually add one with screws. Always follow manufacturer instructions, as improper installation can weaken your helmet.
Nvg Mount Types
The mount/arm is what connects the goggles to the shroud. The three most common types are:
- Rhino Mount: Found on many surplus helmets; uses a bayonet interface.
- Wilcox G24: Considered the best for its durability and adjustability; uses a dovetail interface.
- J-Arm Adapter: Used mainly for monoculars like the PVS-14; simple and lightweight.
Choose a mount that matches your goggles’ attachment point. Dovetail mounts are more secure but cost more.
Step-by-step Guide: Mounting Night Vision Goggles On A Helmet
With the right gear ready, you can now attach your NVGs. Here’s a clear, step-by-step process.
Step 1: Prepare The Helmet
Start by ensuring your helmet is clean and all screws are tight. If you need to install a shroud, use the correct screws and torque settings. Do not overtighten, as this can crack the helmet shell.
Step 2: Attach The Shroud (if Needed)
If your helmet lacks a shroud:
- Align the shroud’s holes with the helmet’s pre-drilled holes.
- Insert the screws and tighten firmly, but do not overtighten.
- Double-check for any movement or gaps.
Step 3: Connect The Nvg Mount
- Slide or snap the mount into the shroud.
- Listen for a click or check that the locking lever is engaged.
- Gently tug the mount to confirm it’s secure.
Step 4: Attach The Goggles
- Align your NVG’s mounting interface (dovetail, bayonet, or J-arm) with the mount.
- Slide or snap the NVG into place until it locks.
- Test the connection by flipping the goggles up and down a few times.
Step 5: Adjust For Comfort And Clarity
- Put the helmet on and fasten the chinstrap.
- Adjust the NVG’s height, angle, and eye relief using the mount’s controls.
- Focus the goggles using their diopter rings.
- Make sure you can easily flip the NVGs up and down.
Step 6: Counterbalance The Helmet
NVGs are front-heavy. Attach a counterweight (often a pouch with batteries) to the back of the helmet. This makes the helmet more comfortable and less likely to slip forward.
Step 7: Final Safety Check
- Shake your head gently to ensure everything is stable.
- Check that all screws and levers are tight.
- Practice flipping the NVGs up and down to build muscle memory.
Practical Tips For Mounting Night Vision Goggles
Many beginners miss important details that can make a big difference in performance and comfort. Here are tips from experienced users:
- Always use a counterweight. Even a small battery pouch can reduce neck fatigue and keep your helmet stable.
- Regularly check screws and mounts. Vibrations and movement can loosen parts over time.
- Practice in daylight first. Get used to mounting and flipping your NVGs before you need them in the dark.
- Label your gear. If you use your NVGs with a team, label your mounts and helmets to avoid mix-ups.
- Carry spare parts. Mounting arms and shrouds can fail at the worst times; a backup can save your mission.
Common Mistakes To Avoid
Mounting NVGs is not hard, but mistakes are easy to make. Some of the most frequent errors include:
- Using the wrong mount type: Always match your NVG’s interface to the mount and shroud.
- Skipping the counterweight: A front-heavy helmet will strain your neck and shift during movement.
- Overtightening screws: This can damage both the helmet and the shroud.
- Ignoring fit: A loose helmet or mount will make it hard to see clearly and can even lead to injury.
- Not practicing: If you only set up your NVGs at night, mistakes are harder to fix in the dark.
Real-world Example: Mounting A Pvs-14 On An Ops-core Bump Helmet
Let’s say you own a PVS-14 monocular and an Ops-Core bump helmet. Here’s how you would mount your NVG:
- Check that your helmet has a three-hole shroud.
- Use a J-arm adapter for the PVS-14.
- Slide the J-arm into a Rhino mount, then secure the Rhino mount into the shroud.
- Attach a counterweight pouch at the back.
- Adjust for comfort, making sure the PVS-14 lines up with your dominant eye.
- Practice flipping the unit up and down and walking around your house to feel the weight and balance.
This process can be adapted for other NVG models and helmets, but always check your specific gear for differences.
Maintenance And Long-term Care
A helmet-mounted NVG setup is an investment. Proper care extends its life and reliability:
- Clean all contacts with a soft brush to remove dirt.
- Lubricate moving parts (like the mount’s arm) with a small amount of silicone grease.
- Inspect for cracks or loose screws after every use.
- Store your gear in a padded case when not in use.
- Replace any damaged parts immediately to avoid accidents.

Comparing Mounting Systems
For those choosing between mounting systems, here is a comparison of the two most popular options:
| Mount System | Security | Adjustability | Cost | Best For |
|---|---|---|---|---|
| Wilcox G24 Dovetail | Very High | Excellent | High ($300–$500) | Military, Professional Users |
| Rhino II Bayonet | Good | Basic | Moderate ($75–$150) | Recreational, Airsoft |
| J-Arm (PVS-14) | Fair | Minimal | Low ($25–$50) | Monocular Use |
Safety Considerations
Using night vision is not just about seeing in the dark. You must also stay safe:
- Never point the NVGs at bright lights. This can damage the image intensifier tubes.
- Avoid sudden movements when the NVGs are down. Your field of view is narrow, and you can trip or bump into objects.
- Always secure loose straps or cables to prevent snagging.
- Do not use NVGs while driving unless specifically trained and authorized.
Frequently Asked Questions
What Is The Best Helmet For Mounting Night Vision Goggles?
The best helmet for NVGs is usually a ballistic or bump helmet with a built-in shroud, like the Ops-Core FAST series or Team Wendy EXFIL. These helmets are designed for stability, comfort, and easy mounting.
Can I Mount Night Vision Goggles On Any Helmet?
Not all helmets are suitable. You need a helmet with a front shroud or a way to securely attach one. Many sports or construction helmets are not strong enough for NVG use.
How Do I Balance The Weight Of Nvgs On My Helmet?
Use a counterweight pouch at the rear of the helmet. This balances the forward weight of the NVGs and helps prevent neck strain.
Are There Adapters To Fit Different Nvgs To Different Helmets?
Yes, many adapters exist for different mounting systems, like dovetail-to-bayonet adapters. Always make sure adapters are rated for your gear’s weight and use.
Where Can I Learn More About Night Vision Goggle Mounting?
A reliable source for further reading is the Wikipedia page on night vision devices.
Mounting night vision goggles on a helmet is a skill you can learn with practice and care. Choose the right helmet, mount, and shroud, follow each step carefully, and always prioritize safety and maintenance. With the proper setup, you will enjoy clear vision in the dark, greater comfort, and longer life from your gear.
