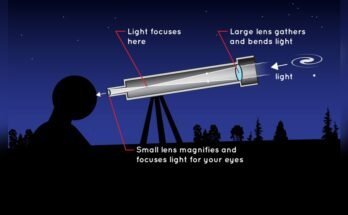
Have you ever looked through a refracting telescope and felt frustrated by blurry images or strange colors? You’re not alone.
Many people who use refracting telescopes face common problems that can spoil their stargazing experience. But understanding these issues can make a huge difference in how you enjoy your telescope. You’ll discover the most frequent problems with refracting telescopes and simple ways to fix or avoid them.
Keep reading to make sure your next night under the stars is clear, sharp, and truly amazing.
Chromatic Aberration
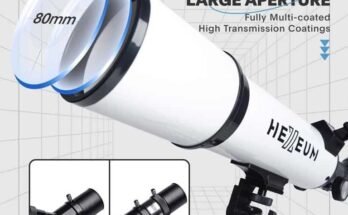
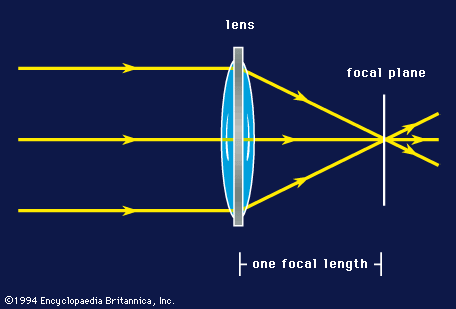
Chromatic aberration is a common issue with refracting telescopes. It causes colored edges around objects viewed through the telescope. This problem happens because lenses bend different colors of light unevenly. The result is a blurry image with unwanted color fringes. Understanding this helps users improve their viewing experience.
Causes Of Color Fringing
Color fringing happens because lenses focus colors at different points. Blue light bends more than red light. This difference creates a halo of colors around stars and planets. The problem is stronger in simple lenses. Larger lenses and longer focal lengths can reduce, but not remove, the effect.
Selecting Achromatic And Apochromatic Lenses
Achromatic lenses combine two types of glass. They bring two colors into focus at the same point. This reduces color fringing. Apochromatic lenses use three or more glass types. They focus three colors very closely. These lenses give clearer, sharper images with less color distortion.
Using Filters To Minimize Color Distortion
Filters can help reduce chromatic aberration. They block some colors that cause fringing. A simple color filter improves contrast and sharpness. Specialized filters target specific wavelengths of light. Using the right filter can make a big difference in image quality.

Lens Alignment Issues
Lens alignment issues are common problems with refracting telescopes. When lenses are not properly aligned, images can appear blurry or distorted. This affects your ability to see clear details of stars, planets, or the moon. Misalignment can happen during transport, setup, or due to wear over time.
Fixing lens alignment can improve your telescope’s performance significantly. Understanding the signs and knowing simple correction methods helps keep your telescope in good shape.
Signs Of Misalignment
Look for blurry or doubled images through the telescope. Stars may appear stretched or have halos. The image might shift when you move the telescope slightly. You could also notice uneven brightness across the lens. These signs usually mean the lenses are out of line.
Diy Collimation Techniques
Use a collimation cap or a simple piece of paper with a small hole. Point the telescope at a bright star or a distant object. Adjust the lens holders slowly while checking the image clarity. Tighten or loosen screws gently to align the lenses. Repeat until the image looks sharp and clear.
When To Seek Professional Adjustment
If adjustments do not improve the image, professional help is needed. Complex misalignments require precise tools and expertise. Avoid forcing parts or making large adjustments yourself. A specialist can realign the lenses correctly without damage. Regular servicing also keeps your telescope working well for years.
Focusing Challenges
Focusing a refracting telescope is not always easy. It needs patience and some skill. Many users face problems with clear images due to focusing issues. These problems can affect your viewing experience and make it hard to see details clearly.
Common Focus Problems
One common problem is the image being blurry. This happens when the lens is not adjusted correctly. Sometimes, the focus knob moves too fast or too slow. This makes fine-tuning difficult. Another issue is the focus slipping after adjustment. This can happen if the parts are loose or worn out.
Improving Focus Mechanisms
Better focus comes from a smooth and precise mechanism. Some telescopes have dual-speed focus knobs. These allow slow and fine adjustments. Using quality materials for the focus tube can reduce slipping. Regular maintenance helps keep the focus mechanism working well. Tightening loose screws can also improve stability.
Tips For Precise Focusing
Start by pointing the telescope at a bright, clear object. Turn the focus knob slowly until the image sharpens. Use both eyes open to reduce strain. Avoid quick or large movements of the focus knob. Stop adjusting when the image looks sharpest. Check focus often during use to keep the image clear.
Image Brightness And Clarity
Image brightness and clarity are key to enjoying views through a refracting telescope. Bright images show more stars and details. Clear images help you see sharp edges and fine shapes. Many factors affect how bright and clear your telescope’s image appears. Understanding these can improve your experience.
Effects Of Lens Quality
The lens quality directly impacts image brightness and sharpness. Cheap lenses often cause dim images and blurriness. High-quality lenses use special glass to reduce light loss. They also correct color errors for clearer views. Look for telescopes with multi-coated lenses for better brightness and clarity.
Cleaning And Maintenance Tips
Dust and smudges on lenses reduce brightness and sharpness. Clean lenses gently with a soft brush or lens cloth. Avoid touching lenses with fingers to prevent oils from spreading. Store your telescope covered to keep dust away. Regular maintenance keeps images bright and clear over time.
Optimizing Viewing Conditions
Clear skies improve image brightness and clarity. Avoid viewing near bright lights or city glow. Watch on nights with little wind and low humidity. Use your telescope after it cools to match outside temperature. These simple steps make your telescope’s images brighter and sharper.
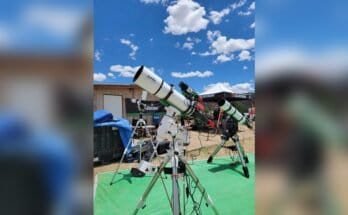
Mount Stability And Tracking
Mount stability and tracking are crucial for clear views through refracting telescopes. A shaky mount causes blurry images and makes it hard to follow stars or planets. Tracking helps keep the object in the center of the view as the Earth moves. Poor tracking and unstable mounts reduce the quality of your observation sessions.
Impact Of Unstable Mounts
An unstable mount shakes the telescope easily. Even small vibrations blur the image. This problem worsens at higher magnifications. It also makes it tough to take long-exposure photos. The telescope may drift off the target quickly, leading to frustration.
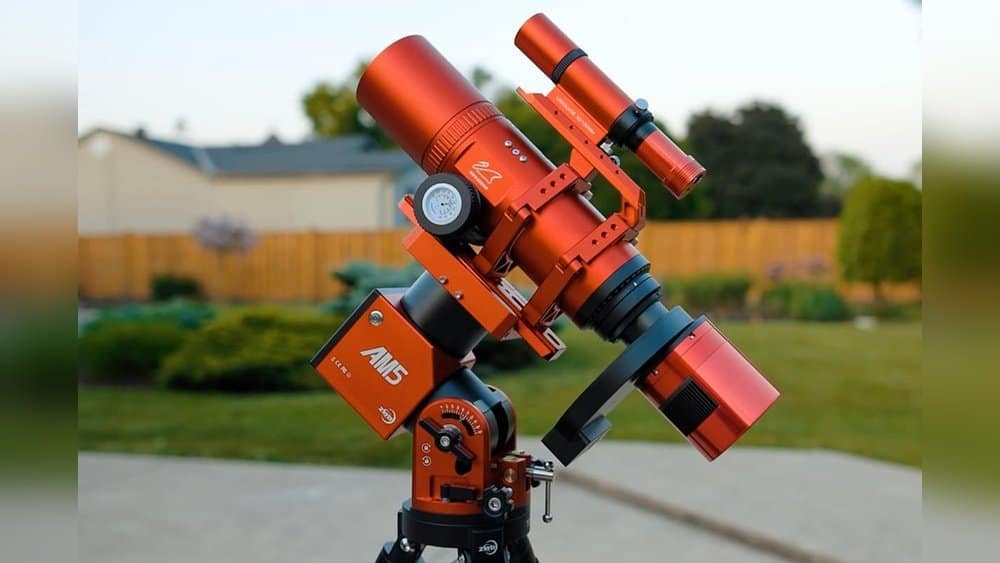
Upgrading Mounts For Better Performance
Better mounts improve stability and tracking. Equatorial mounts offer smooth tracking along the Earth’s rotation. Motorized mounts allow automatic tracking of celestial objects. Investing in a sturdy mount reduces vibrations and drift. This upgrade enhances both viewing and astrophotography experiences.
Balancing And Calibration Techniques
Proper balance reduces strain on the mount and motors. Adjust counterweights until the telescope stays steady without support. Calibrate the mount regularly for accurate tracking. Use slow-motion controls for fine adjustments. These steps help maintain smooth and precise movement during observations.
Atmospheric Disturbances
Atmospheric disturbances affect the clarity of images seen through refracting telescopes. The air above Earth moves and changes temperature. These changes cause light to bend and blur, making stars and planets appear to flicker or shake. This effect is called “seeing,” and it can limit the quality of your observations.
Dealing With Turbulence And Seeing Conditions
Turbulence happens when layers of air with different temperatures mix. It causes stars to twinkle and images to blur. To reduce turbulence effects, avoid observing near buildings or roads. These places often have warm air rising, which increases distortion. Choose a spot with open sky and steady air for better views.
Best Times For Observation
Nighttime air is cooler and more stable than daytime air. Early morning hours often have the clearest skies. During these times, the air moves less, improving seeing conditions. Avoid observing just after sunset, when the ground is still warm. Check weather reports for calm and clear nights for the best experience.
Using Adaptive Techniques
Adaptive techniques help reduce atmospheric effects. Use a telescope with a larger aperture to gather more light. This can improve image sharpness. Short exposure times in photography reduce blur from air movement. Some advanced telescopes use adaptive optics to adjust mirrors in real time. These methods help create clearer and sharper images.
Frequently Asked Questions
What Causes Chromatic Aberration In Refracting Telescopes?
Chromatic aberration occurs due to lens dispersion, which separates light into colors. This results in blurred or colored edges in images. It affects image clarity and is a common issue in simple refracting telescopes.
Why Do Refracting Telescopes Suffer From Image Distortion?
Image distortion happens when lenses are not perfectly shaped or aligned. This causes objects to appear stretched or warped. Proper lens design and alignment reduce this problem but it remains a challenge in refractors.
How Does Lens Fogging Affect Refracting Telescope Performance?
Lens fogging happens when moisture condenses on the lens surface. It blocks light and reduces image sharpness. Using lens caps and anti-fog coatings helps prevent this issue during observation.
What Limits The Size Of Refracting Telescope Lenses?
Large lenses are heavy and prone to sagging under their own weight. This causes image distortion and mechanical stress. These factors limit the practical size of refracting telescope lenses compared to reflectors.
Conclusion
Refracting telescopes bring joy but also face some common issues. Chromatic aberration and image distortion can affect viewing. Lens size limits how much light these telescopes gather. Regular cleaning and proper use help avoid many problems. Choosing the right model suits different needs and budgets.
Understanding these challenges improves your telescope experience. Keep exploring the stars with patience and care. The night sky holds many wonders waiting for you.