Use fast shutter, wide aperture, and balanced ISO for sharp, well-exposed wildlife images.
I have spent years shooting birds, deer, and predators at dawn and dusk. I know what camera settings work best for wildlife photography across weather, light, and species. This guide breaks settings into clear choices, explains why they matter, and gives real examples from fieldwork so you can get better shots faster. Read on to learn practical settings, common mistakes, and a ready-to-use checklist that you can apply on your next wildlife outing.
Prime Day Pick
Limited-time Prime Day price. Check current discount on Amazon.

Core exposure trio: shutter speed, aperture, ISO
Getting exposure right is the heart of what camera settings work best for wildlife photography. These three controls work together. Change one and you balance the others.
Prime Day Pick
Limited-time Prime Day price. Check current discount on Amazon.
Shutter speed controls motion. For slow or still animals, 1/500s can work. For fast birds in flight, aim for 1/2000s. I once used 1/2500s to freeze a falcon dive and kept the frame sharp.
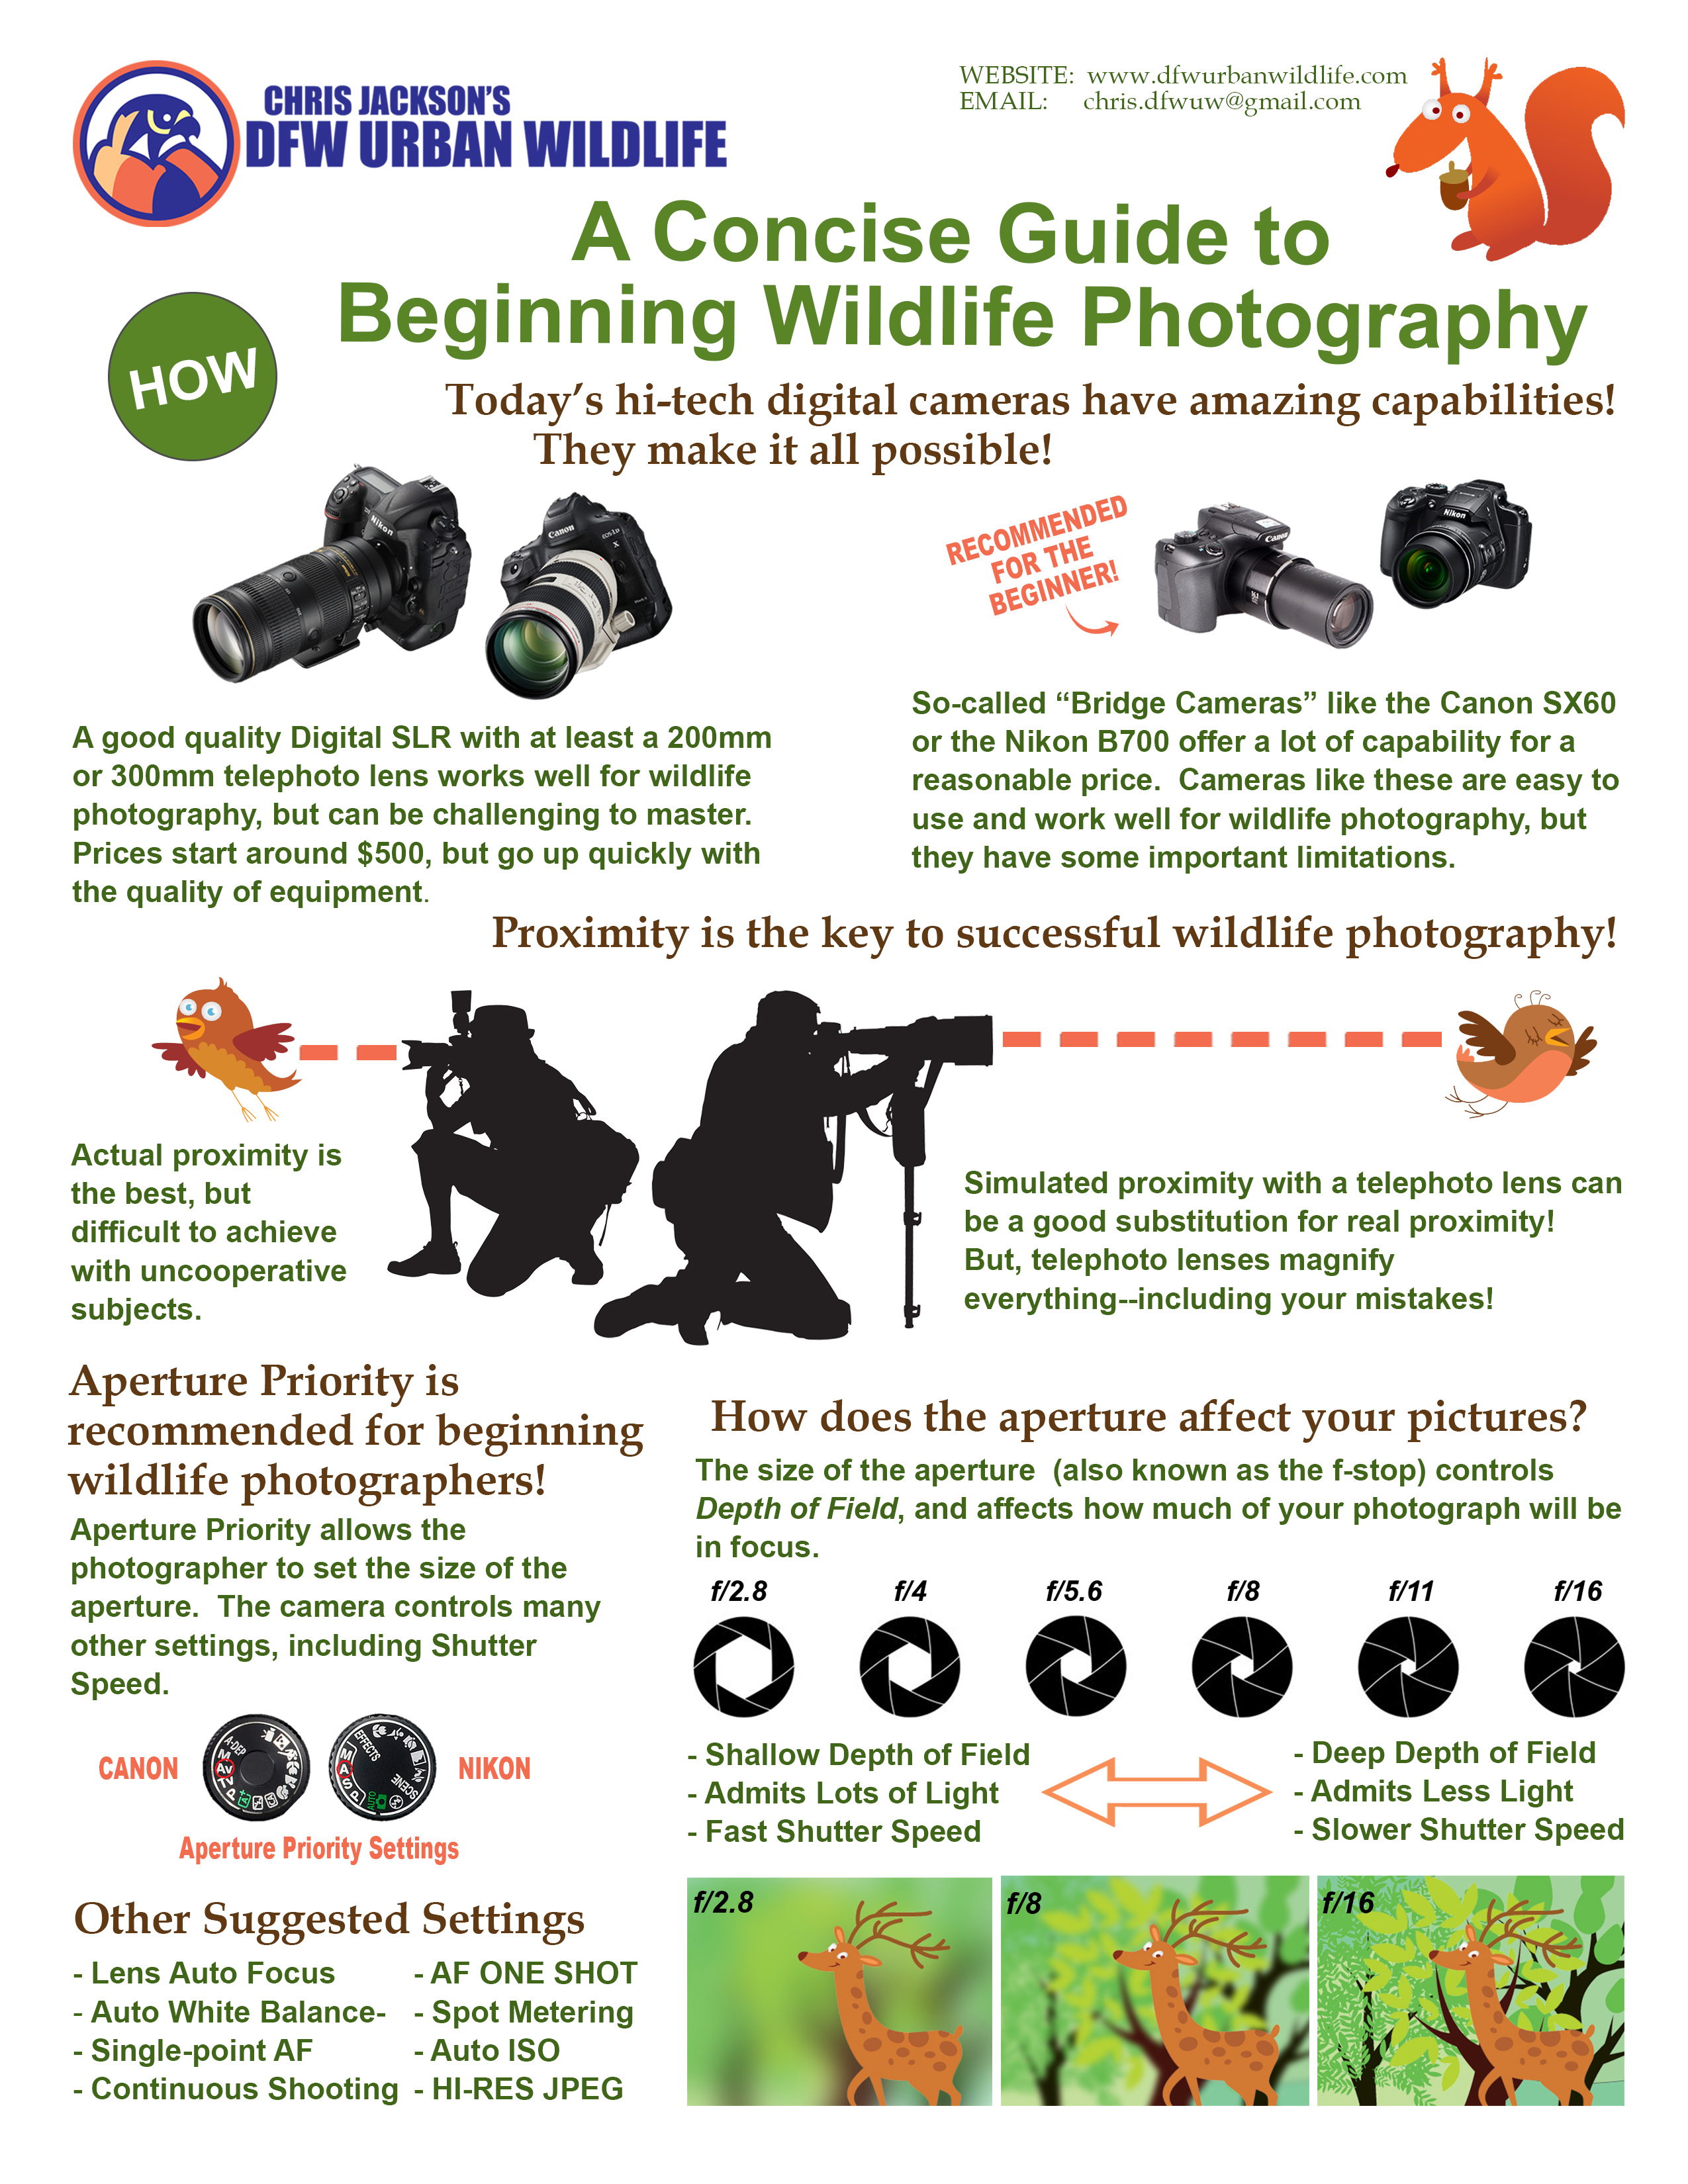
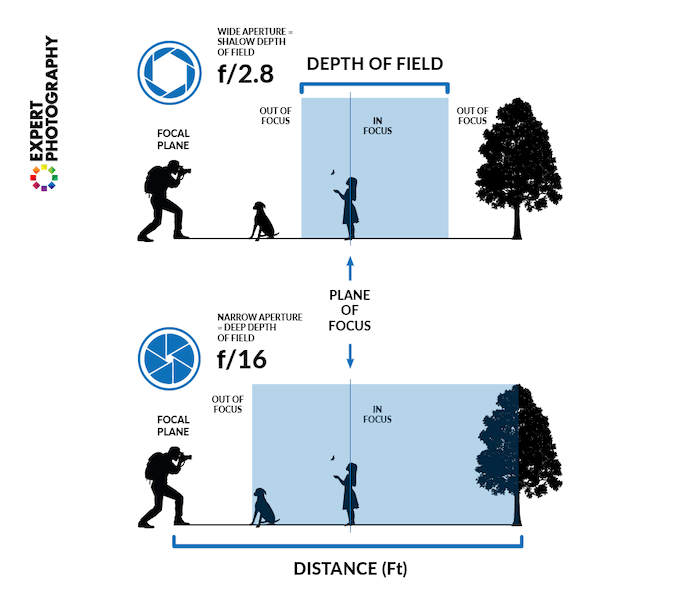
Aperture controls depth of field. Use wide apertures like f/4 or f/5.6 for subject isolation. Stop down to f/8 when you need more depth for larger animals.
ISO lets you reach the right exposure in low light. Modern cameras handle high ISO well. I raise ISO before giving up shutter speed. On foggy mornings I use ISO 1600–3200 to keep shutter speed safe.
Practical starting presets
Prime Day Pick
Limited-time Prime Day price. Check current discount on Amazon.
- For perched birds: 1/1000s, f/5.6, auto ISO with 160–3200 range.
- For running mammals: 1/1250s, f/5.6–f/8, auto ISO up to 3200.
- For slow subjects in good light: 1/500s, f/8, ISO 100–400.
Why this trio matters
- Shutter speed freezes motion, aperture controls blur and focus area, ISO protects exposure when light is low. Balancing these is the essence of what camera settings work best for wildlife photography.

Autofocus, drive modes, and focus area
Sharp focus is critical. Choosing the right autofocus mode and drive mode helps you get decisive frames.
Autofocus modes
- Single-point AF for static subjects. Use it for perched birds and portraits of mammals.
- Continuous AF (AI Servo/AF-C) for moving subjects. This tracks motion and keeps focus locked.
- Eye-detection AF helps with faces, but many wildlife shots rely on single-point or zone AF.
Focus area selection
- Use a small single point for precise control.
- Use a dynamic or zone AF when subjects move unpredictably.
- Back-button focus gives more control and reduces hunting.
Drive modes
- Use continuous high-speed drive for action. It increases your chance of catching peak moments.
- Use single-shot when you want deliberate framing and exact timing.
Field tip from experience
- I use back-button focus and AF-C with a 9-point zone for ducks in flight. It reduces misfocus and keeps the bird sharp even when the background is busy.
Metering, exposure compensation, and histograms
Metering affects how bright or dark your photo becomes. Wildlife scenes can trick meters, especially with snow or dark fur.
Metering modes
- Evaluative/matrix metering for general use.
- Spot metering when subject is small in frame or against a bright/dark background.
- Center-weighted metering for steady subjects near the frame center.
Exposure compensation
- Use +1 to +2 stops for dark backlit animals to brighten them.
- Dial in -1 stop for snowy scenes to preserve detail.
- Bracket exposures when unsure.
Use the histogram
- Check the histogram to confirm there is no clipping.
- Adjust exposure compensation and re-shoot until the histogram shows detail in highlights and shadows.
Real-world application
- I once shot a dark bear against bright sky. Spot metering on the bear with +1 EV kept fur detail without blowing the sky.
White balance and RAW workflow
White balance affects color tone. Shooting RAW gives you flexibility.
White balance settings
- Auto white balance is fine in most cases.
- Use a preset (cloudy, shade) when you want consistent warmth.
- For tricky light, shoot RAW and adjust later.
Why RAW?
- RAW keeps more detail in highlights and shadows. It lets you correct white balance and exposure with less quality loss.
- I always shoot RAW for wildlife to retain maximum editing flexibility.
Lenses, stabilization, and image quality settings
Lens choice impacts what camera settings work best for wildlife photography. Focal length, aperture, and stabilization shape your approach.
Lenses to consider
- Telephoto 300mm to 600mm for distant subjects.
- 70–200mm for moderately sized animals and closer work.
- A fast prime for low-light and shallow depth of field.
Stabilization and technique
- Use lens or body stabilization when panning or when slower shutter speeds are required.
- When using very long lenses, prefer a sturdy tripod or monopod.
Image quality settings
- Shoot in RAW or RAW + JPEG for best editing headroom.
- Use 12–14 bit RAW if available for smoother gradients.
Personal note
- Early in my career I relied too much on high ISO rather than improving technique. Stabilization and lens choice made a bigger difference than I expected.

Composition, shutter tricks, and creative choices
Good settings alone do not make strong images. Composition and timing matter.
Panning for motion
- Use slower shutter speeds like 1/60s to 1/125s and pan with the subject.
- Practice to get a sharp subject with a blurred background.
Background control
- Wide aperture isolates the subject from busy backgrounds.
- Change position to get cleaner backgrounds.
Framing tips
- Fill the frame when possible for impact.
- Leave space in the direction the animal is moving.
Practical creative settings
- Use burst mode with AF-C for action.
- Consider slightly underexposing to preserve highlights on white birds.
Scenario-based recommended settings
Concrete starting points for common wildlife situations. Fine-tune for your gear and light.
Birds in flight
- Shutter: 1/2000s
- Aperture: f/5.6
- ISO: Auto 200–3200
- AF: AF-C, continuous high drive
Perched birds or small mammals
- Shutter: 1/1000s
- Aperture: f/5.6–f/8
- ISO: 100–800
- AF: Single-point or small zone
Large mammals moving slowly
- Shutter: 1/500s
- Aperture: f/8
- ISO: 200–1600
Nocturnal or low-light wildlife
- Shutter: as fast as subject requires, try 1/500s
- Aperture: as wide as lens allows
- ISO: 1600–6400, test limits
- Use stabilization and a quiet shutter if possible
I often carry a cheat sheet with these presets. In the field it saves time and helps me react faster.
Practical checklist and camera setup routine
A quick routine to set your camera before heading into the field.
Pre-shoot checklist
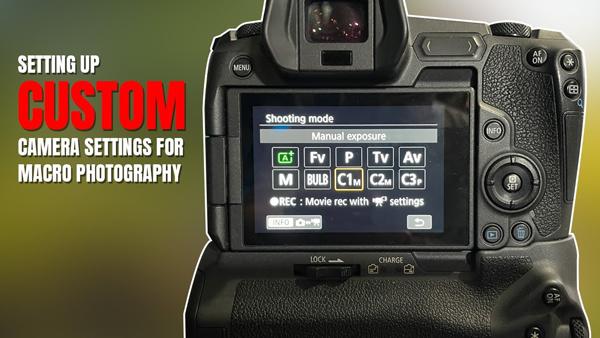
- Set shooting mode: Aperture priority or Manual for full control.
- Set AF mode: AF-C for action, One-Shot for static.
- Configure ISO: Auto with upper limit or manual based on light.
- Choose drive mode: Continuous high for action.
- Check exposure compensation and metering mode.
- Mount lens and steady device: monopod or tripod as needed.
- Enable RAW capture and set image stabilization if needed.
Field routine
- Start with preset for the scenario.
- Check histogram after the first shots.
- Adjust shutter/aperture/ISO based on results.
- Use back-button focus and test AF performance.

Common mistakes and how to avoid them
Avoid these traps that ruin many wildlife shots.
Common errors
- Using too slow a shutter speed for moving subjects. Set a faster shutter.
- Letting ISO climb without testing noise. Know your camera’s limits.
- Relying on auto mode for critical moments. Manual or aperture priority gives better control.
- Neglecting focus point selection. Choose the point that covers the eye or head.
- Ignoring background and composition. Move to improve the view.
Lessons from my mistakes
- Once I underexposed a fox and couldn’t recover shadows. Now I check histograms and expose to preserve shadow detail when possible.
What camera settings work best for wildlife photography — summary of best practices
Repeatable choices that work across species and light.
Key takeaways
- Prioritize a fast shutter speed to freeze motion.
- Use wide aperture for subject isolation; stop down when you need depth.
- Use auto ISO with a sensible upper limit to protect shutter speed.
- Choose AF-C and continuous drive for action.
- Shoot RAW and check histograms to ensure usable files.
These practices reflect years of trial and real-world testing. They form the backbone of what camera settings work best for wildlife photography.
Frequently Asked Questions of what camera settings work best for wildlife photography
What shutter speed is best for birds in flight?
Use 1/1500s to 1/3000s for most birds in flight. Faster speeds freeze wings and reduce motion blur.
Should I use aperture priority or manual mode for wildlife?
Aperture priority is a great balance for many situations. Use manual mode when light is constant and you want full control.
How high can I set ISO before image quality suffers?
It depends on your camera. Modern bodies handle ISO 1600–6400 well, but test your camera to find acceptable noise levels.
Is back-button focus necessary for wildlife photography?
Back-button focus is highly recommended. It separates focus from the shutter and improves tracking and timing.
What focal length should I use for small birds?
Aim for 400mm to 600mm or longer. Longer focal lengths help fill the frame and keep distance without disturbance.
Conclusion
Mastering what camera settings work best for wildlife photography takes practice and testing. Use fast shutter speeds, balanced apertures, and sensible ISO limits. Pair those settings with the right AF mode, lens choice, and composition. Start with the presets here, test on local wildlife, and refine based on your camera and style. Try one session this week with the checklist, learn from the results, and share your progress or questions below for more tips.